Rundas!plick Description

Rundas!plick usually infects the Computer system from the various Internet resources like peer to peer networks, emails, instant messenger and waits till the scheduled time to initiate its payload in order to download components of Rundas!plick. It has been officially identified as a hazardous Trojan horse, is especially programmed to format hard disk, delete several critical folders and corrupt operating system files. Rundas!plick disguises itself from the PC users and stays resident in the system background. In early 2016, this trojan virus was released and spread all over the Internet by Criminal cyberpunks for their own personal benefits. Research report shows that it is very destructive in nature, so its danger level is severe.
Rundas!plick belongs to Rundas Trojan family, which can not be easily deleted or detected even by multi-layered security software. Though, it has typical source codes which are very good at hiding and making itself disappear from the public. Even, when this trojan begins to exert questionable effects on your Computer, you may have no idea that what is wrong with your PCs.
How to find out Rundas!plick is on your PC?
As it has been mentioned above that this hides by hooking itself with legitimate programs or replicating itself into hidden system folders. Hence, it becomes very difficult to figure out the sign of Rundas!plick trojan files. To find out whether your system is infected with Rundas!plick or not, we recommend you to scan your system with multi-layer Antivirus software which must be highly efficient and updated. Even you can check out %Downloads%, %ProgramFiles% or other suspicious folders on your system. If you find Rundas!plick related files, delete them instantly. In other way, you can find it by noticing your PC’s performance issues or unexpected behavior like system crash, shutdown, Screen blackout, slow Internet, degraded system performance etc.
Hazardous impact caused by Rundas!plick
When it falls on your PC or home-computers, first of all, it disables systems protection settings and let the Cyberpunks access your PC remotely via Backdoor access. Though, they might lock down your important files and blackmail you to pay a huge amount. Even, they might steal your credentials and private documents and public them without any notification. Credentials includes emails, mailing address, ID/Password of social accounts, online bank transactions etc.
Rundas!plick – Infiltration Resource
-
Through infected USBs like Pen drives or hard drives
-
Via drive by downloads from Phishing websites
-
Via Spam email attachments or links
-
From P2P Network platform
-
From social media networks or advertising sites
Therefore, if you want to protect your PC and data, we recommend you to remove Rundas!plick immediately from your PC.
>>Free Download Rundas!plick Scanner<<

How to Remove Rundas!plick from Compromised PC (Manual Steps)
(This guide is intended to help users in following Step by Step instructions in making Windows Safe)
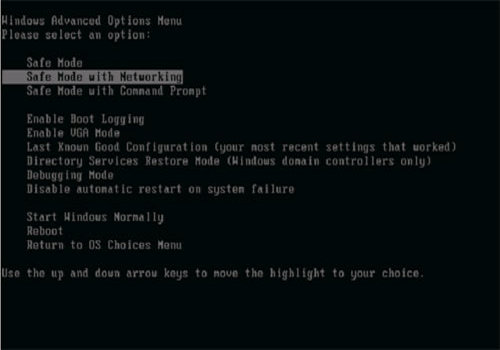
The first step which need to be followed is to Restart Windows PC in Safe Mode
Reboot in Safe Mode (For Windows XP | Vista | Win7)
- Restart Computer
- Tap on F8 continuously when the PC starts booting and select the option to enter Safe Mode with Networking.
For Windows 8/8.1
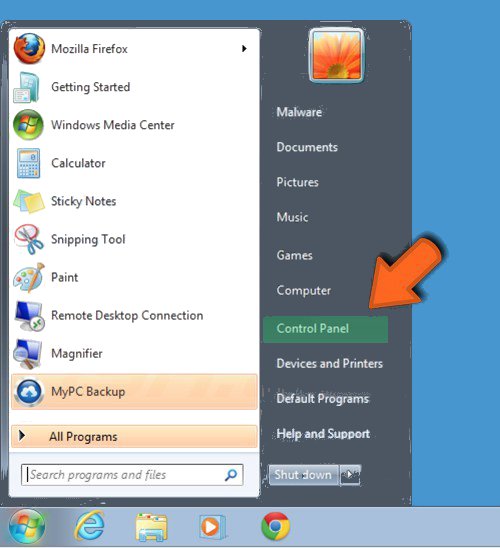
- Press on the Start Button and then Choose Control Panel from the menu option
- Users need to opt for System and Security, to select Administrative Tools and then System Configuration.

3. Next, Click on the Safe Boot option and then choose OK, this will open a pop-up window, next Select Restart Option.
For Windows 10
- Start Menu is to be selected to Open it
- Press the power button icon which is present in the right corner, this will display power options menu.
- Keeping the SHIFT Key pressed on the keyboard, select the restart option. This will reboot Win 10
- Now you need to select the Troubleshoot icon, followed by advanced option in the startup Settings. Click on Restart. This will give the option to reboot, now select Enter Safe Mode with Networking.
Step 2. Uninstall Rundas!plick from Task Manager on Windows
How to End the Running Process related to Rundas!plick using Task Manager
- Firstly, Open Task Manager by Pressing Ctrl+Shift+Esc in Combination
- Next, Click on processes to Find Rundas!plick
- Now Click and select End Process to terminate Rundas!plick.

Step3: How to Uninstall Rundas!plick from Control Panel on Windows
for Win XP| Vista and Win 7 Users
- Click and Select on Start Menu
- Now Control Panel is to be selected from the list
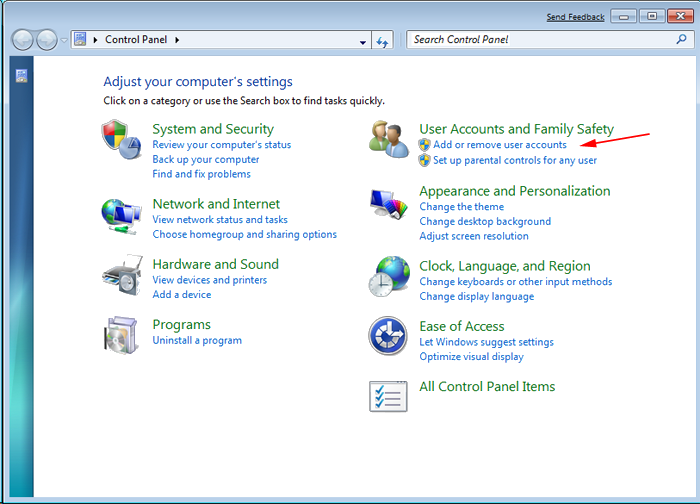
- Next Click on Uninstall Program
- Users need to Choose suspicious program related to Rundas!plick and right clicking on it.
- Finally, Select Uninstall option.

For Win 8
- Click and Select “Charms bar”
- Now Select Settings Option
- Next Click on Control Panel
- Select on Uninstall a Program Option and right click on program associated to Rundas!plick and finally uninstall it.

Still Couldn’t Remove Rundas!plick, Watch The Following Video Tutorial
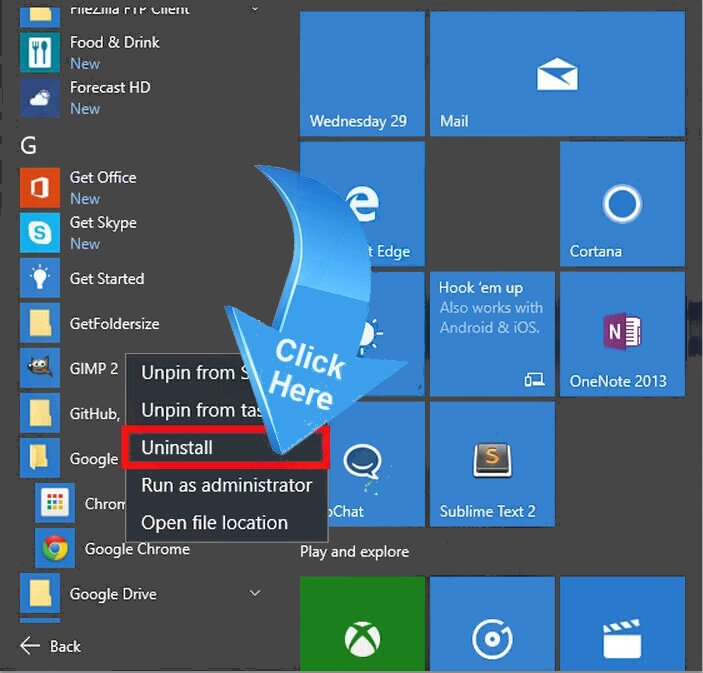
For Windows 10
- The first Step is to Click and Select on Start Menu
- Now Click on All Apps
- Choose Rundas!plick and other suspicious program from the complete list
- Now right Click on to select Rundas!plick and finally Uninstall it from Windows 10

Step: 4 How to Delete Rundas!plick Created Files from Registry
- Open Registry by Typing Regedit in the Windows Search Field and then press on Enter.
- This will open the registry entries. Now users need to press CTRL + F together and type Rundas!plick to find the entries.
- Once located, delete all Rundas!plick named entries. If you are unable to find it, you need to look up for it on the directories manually. Be careful and delete only Rundas!plick entries, else it can damage your Windows Computer severely.
HKEY_CURRENT_USER—-Software—–Random Directory.
HKEY_CURRENT_USER—-Software—Microsoft—-Windows—CurrentVersion—Run– Random
HKEY_CURRENT_USER—-Software—Microsoft—Internet Explorer—-Main—- Random

Still having any problem in getting rid of Rundas!plick, or have any doubt regarding this, feel free to ask our experts.

Related Posts
 Remove PyXie Trojan from Windows 10 : Take Down PyXie Trojan
- Killua Backdoor Uninstallation: Tutorial To Delete Killua Backdoor In Just Few Steps
- Remove Gon Malware from Windows 7
- EYE Malware Removal: Help To Remove EYE Malware Completely
- Delete CSPY Downloader Manually
- Possible Steps For Deleting Win32/Bundpil from Windows 10