GameOver Zeus – Brief Description
GameOver Zeus is a peer to peer botnet, especially crafted for stealing online banking credentials and spreading CryptoLocker file encoder virus among Windows users globally. This brand new malware is derived from Zeus trojan – first appeared back in the beginning of 2006. There is logic behind the name of this new malware. Actually, while analyzing its source files, experts found one its files named as – gameover2.php. Currently, threat actors are using this trojan to make easy money through various online illegal activities. Before elaborating about its activities, we have to tell you that GameOver Zeus has half dozens of alternative names such as GOZ, P2PZeus and GameOver Trojan. During online inspection, we got to know that name of cyber thieve behind release of this trojan. He is a Russian hacker – Evgeniy Mikhailovich Bogachev, also infamous as Slavik.

Evidently, GameOver Zeus is distributed through use of a botnet named – Cutwail. However its previous variants was using a highly secured P2P communication system to have communication between its nodes and C2 servers in order to reduce its vulnerability to legal enforcement actions. You should know that the algorithms used in the new variant of Zeus trojan appears to be modeled on a quite famous Kademila Peer to Peer protocol. Apparently, GameOver Zeus is one of the biggest threat in history of malware having multiple features. Taking it serious, the U.S. Department of Justice announced that an international inter-agency – Operation Tovar has succeed in temporarily blocking communication between the trojan and its C2 servers. Beware, it steals your financial information and delivers CryptoLocker ransomware as well.
Safely dealing with GameOver Zeus trojan
Since, the brand new iteration of Zeus trojan is highly sophisticated, you need to pay closure attention while performing removal operation. If you delete wrong file even by mistake then you may not be able to restart your PC. You will have to reinstall Windows OS again to use your PC. Thus, it will be best if you use a reliable Antimalware to detect and remove GameOver Zeus from your computer. But if you want to give manual removal a try then please pay your best attention and follow essential steps wisely.
>>Free Download GameOver Zeus Scanner<<
Manual GameOver Zeus Removal Guide
Step 1: How to Start your PC in Safe Mode with Networking to Get Rid of GameOver Zeus
(For Win 7 | XP | Vista Users)
- first of all PC is to be rebooted in Safe Mode with Networking
- Select on Start Button and Click on Shutdown | Restart option and select OK
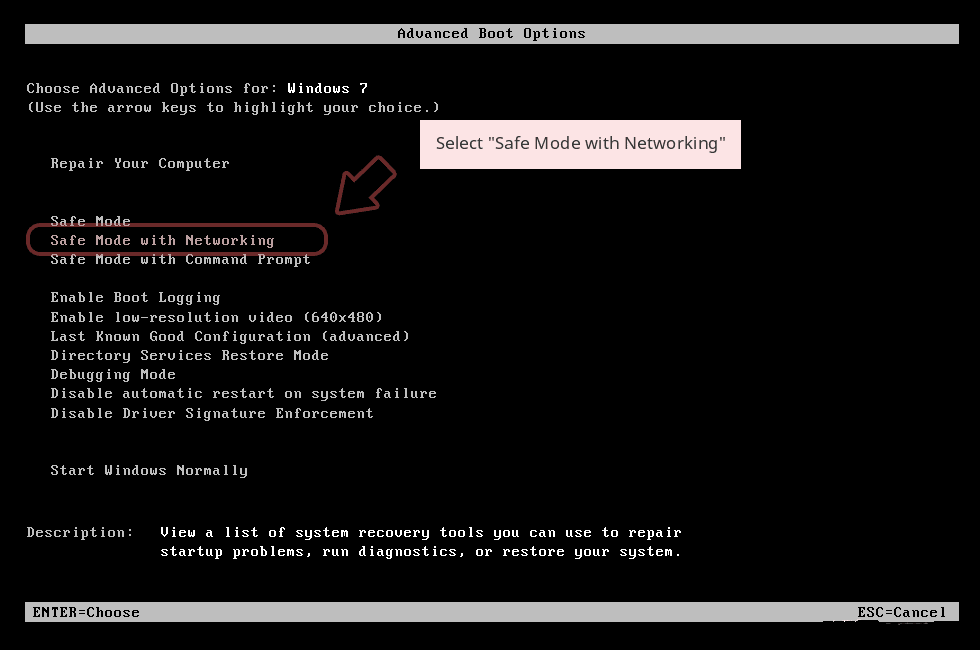
- when the PC restarts, keep tapping on F8 until you don’t get Advanced Boot Options.
- Safe Mode with Networking Option is to be selected from the list.

(For Win 8 | 8.1 | Win 10 Users)
- Click on Power Button near Windows Login Screen
- Keep Shift Button on the keyboard pressed and select Restart Option
- Now Select on Enable Safe Mode with Networking Option

In case GameOver Zeus, is not letting your PC to Start in Safe Mode, then following Step is to followed
Step 2: Remove GameOver Zeus Using System Restore Process
- PC need to be rebooted to Safe Mode with Command Prompt
- As soon as Command Prompt Window appear on the screen, select on cd restore and press on Enter option

Type rstrui.exe and Click on Enter again.

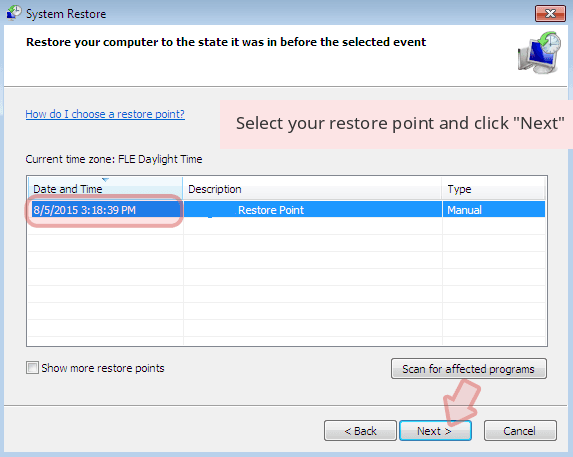
Now users need to Click on Next option and Choose restore point that was the last time Windows was working fine prior to GameOver Zeus infection. Once done, Click on Next button.


Select Yes to Restore your System and get rid of GameOver Zeus infection.

However, if the above steps does not work to remove GameOver Zeus, follow the below mentioned steps
Step:3 Unhide All Hidden Files and Folders to Delete GameOver Zeus
How to View GameOver Zeus Hidden Folders on Windows XP
- In order to show the hidden files and folders, you need to follow the given instructions:-
- Close all the Windows or minimize the opened application to go to desktop.
- Open “My Computer” by double-clicking on its icon.
- Click on Tools menu and select Folder options.
- Click on the View tab from the new Window.
- Check the Display contents of the system folders options.
- In the Hidden files and folders section, you need to put a check mark on Show hidden files and folders option.
- Click on Apply and then OK button. Now, close the Window.
- Now, you can see all the GameOver Zeus related hidden files and folders on the system.

How to Access GameOver Zeus Hidden folders on Windows Vista
- Minimize or close all opened tabs and go to Desktop.
- Go to the lower left of your screen, you will see Windows logo there, click on Start button.
- Go to Control Panel menu and click on it.
- After Control Panel got opened, there will two options, either “Classic View” or “Control Panel Home View”.
- Do the following when you are in “Classic View”.
- Double click on the icon and open Folder Options.
- Choose View tab.
- Again move to step 5.
- Do the following if you are “Control Panel Home View”.
- Hit button on Appearance and Personalization link.
- Chose Show Hidden Files or Folders.
- Under the Hidden File or Folder section, click on the button which is right next to the Show Hidden Files or Folders.
- Click on Apply button and then hit OK. Now, close the window.
- Now, to show you all hidden files or folders created by GameOver Zeus, you have successfully considered Windows Vista.

How to Unhide GameOver Zeus Created Folders on Windows 7
1. Go to the desktop and tap on the small rectangle which is located in the lower-right part of the system screen.
2. Now, just open the “Start” menu by clicking on the Windows start button which is located in the lower-left side of the PC screen that carries the windows logo.
3. Then after, look for the “Control Panel” menu option in the right-most row and open it.
4. When the Control Panel menu opens, then look for the “Folder Options” link.
5. Tap over the “View tab”.
6. Under the “Advanced Settings” category, double click on the “Hidden Files or Folders” associated with GameOver Zeus.
7. Next, just select the check-box in order to Show hidden files, folders, or drives.
8. After this, click on “Apply” >> “OK” and then close the menu.
9. Now, the Windows 7 should be configured to show you all hidden files, folders or drives.

Steps to Unhide GameOver Zeus related Files and Folders on Windows 8
- First of all, power on your Windows PC and click on start logo button that is found in left side of the system screen.
- Now, move to program lists and select control panel app.
- When Control panel is open completely, click on more settings option.
- After, you will see a Control panel Window and then you choose “Appearance and Personalization” tab.
- In Advance settings dialogue box, you need to tick mark on Show hidden files and folders and clear the check box for Hide protected system files.
- Click on Apply and Ok button. This apply option helps you to detect and eradicate all types of GameOver Zeus related suspicious files.
- Finally, navigate your mouse cursor on close option to exit this panel.

How to View GameOver Zeus associated folders on Windows 10
1. Open the folder if you wish to unhide files.
2. Search and Click on View in Menu bar
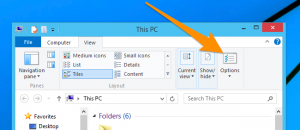
3. In Menu click on to view folder options.
4. Again click on View and Enable Radio Button associated with Show hidden files created by GameOver Zeus, folder and drive.
5. Press apply and OK.

Step 4: Press Start Key along with R- copy + paste the below stated command and Click on OK
notepad %windir%/system32/Drivers/etc/hosts
- This will open up a new file, in case if your system has been hacked, some IP’s will be shown at the bottom of the screen

Click on the Start Menu, Input “Control Panel” in the search box —> Select. Network and Internet —> Network and Sharing Center —> Next Change Adapter Settings. Right-click your Internet connection —> Select on Properties.
- In case if you find Suspicious IP in the local host –or if you are finding it difficult and have any problem then submit question to us and we will be happy to help you.


