Brief Description on Gen:[email protected]@aacXZjni

Gen:[email protected]@aacXZjni is a dangerous file encryption Trojan that was detected on February 19th, 2018. This malware is reported to arrive on targeted Windows machines through phishing emails that suggest system users to run a malicious macro script. Needless to say, running these scripts allows the Trojan to enter the targeted computers. The harmful macro script installs the threat into the AppData directory and then loads it into the RAM. Consequently, the Gen:Trojan.Heur.FU.iLW@aacXZjni performs a quick scan in order to index the connected data storage and mark the stored files for encryption.

Research report revealed that the Trojan might run as an executable file named '1cv8s32-n.exe' on compromised machine and the encoded files receive the suffix '.messenger-[random characters]'. After that, you are likely to find a ransom notification on your system's desktop in the name of 'Инструкция по дешифровке.txt', translated in English (Decryption instructions.txt). This malware is suspected to be aimed at the computer users located in Russia primarily. However, Gen:Trojan.Heur.FU.iLW@aacXZjni can be deployed to a wider users with the help of spambots.
Malicious Activities of Gen:Trojan.Heur.FU.iLW@aacXZjni
This Trojan can download a malevolent code from a Command and Control server. Once getting inside the targeted machine, it performs the malicious activities. The threat enables criminal hackers in order to gain remote access and also take control over the infected PC. Gen:Trojan.Heur.FU.iLW@aacXZjni may be propagated via malicious mail attachments, and generally conceals or is made of harmful PDF on its name. If the system user opens an attached file carelessly, the Trojan immediately downloads a malevolent file and then creates a number of malicious registry entries. Then after, it connects your computer with another machine and invades other destructive infections.
How To Deal with Gen:[email protected]@aacXZjni?
The virus developers appear to control an email account identified as '[email protected]' and they are likely to rest the payments in the form of Bitcoins so that the transactions between victims and hackers are quite difficult to track. The Gen:[email protected]@aacXZjni virus does not any kind of new thing to the crypto-threat scene, but the security experts estimate that the business of ransomware is worth a minimum of 25 billion USD and it is no surprise that numerous threat actors might be interested in taking benefit of such evil businesses. Besides, it uses secure encryption algorithms, and the best way to retrieve from the vicious attack is to load backup copies. At last, you will need a reputed and trusted anti-malware program to eliminate Gen:Trojan.Heur.FU.iLW@aacXZjni threat and other traces left by this malware on your system.
>>Free Download Gen:[email protected]@aacXZjni Scanner<<

Manual Gen:[email protected]@aacXZjni Removal Guide
Step 1: How to Start your PC in Safe Mode with Networking to Get Rid of Gen:[email protected]@aacXZjni
(For Win 7 | XP | Vista Users)
- first of all PC is to be rebooted in Safe Mode with Networking
- Select on Start Button and Click on Shutdown | Restart option and select OK
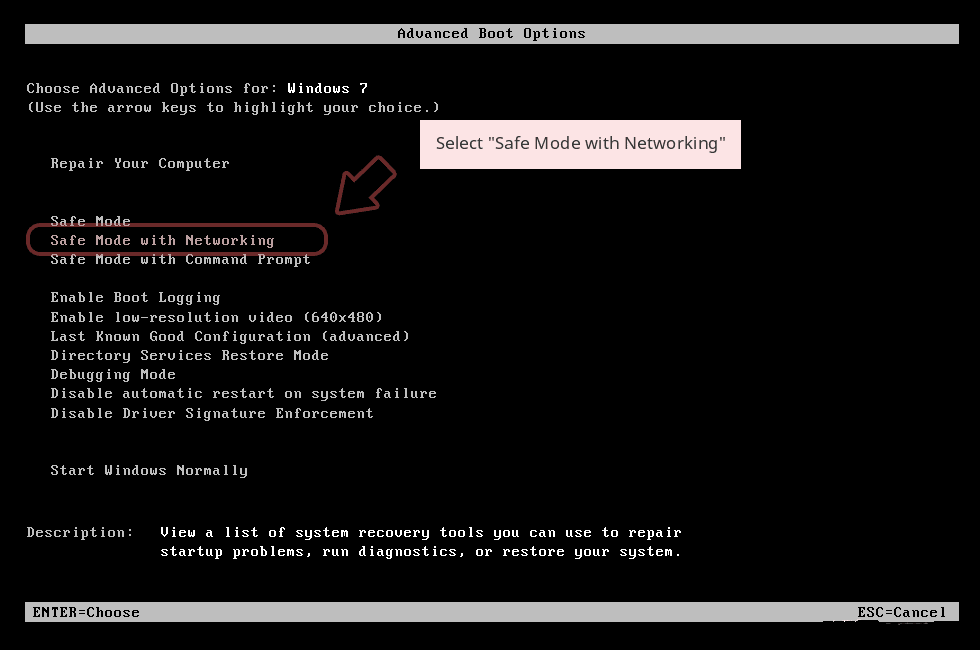
- when the PC restarts, keep tapping on F8 until you don’t get Advanced Boot Options.
- Safe Mode with Networking Option is to be selected from the list.
(For Win 8 | 8.1 | Win 10 Users)
- Click on Power Button near Windows Login Screen
- Keep Shift Button on the keyboard pressed and select Restart Option
- Now Select on Enable Safe Mode with Networking Option

In case Gen:[email protected]@aacXZjni, is not letting your PC to Start in Safe Mode, then following Step is to followed
Step 2: Remove Gen:[email protected]@aacXZjni Using System Restore Process
- PC need to be rebooted to Safe Mode with Command Prompt
- As soon as Command Prompt Window appear on the screen, select on cd restore and press on Enter option
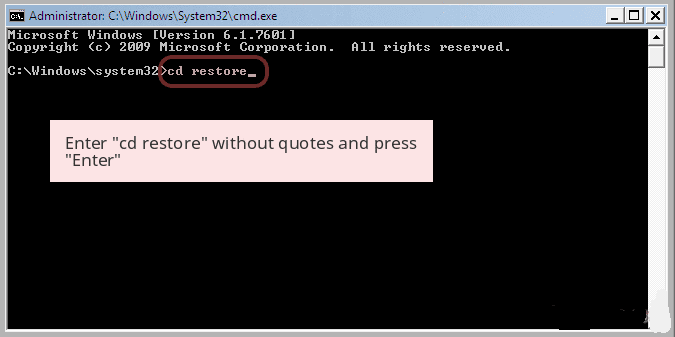
Type rstrui.exe and Click on Enter again.

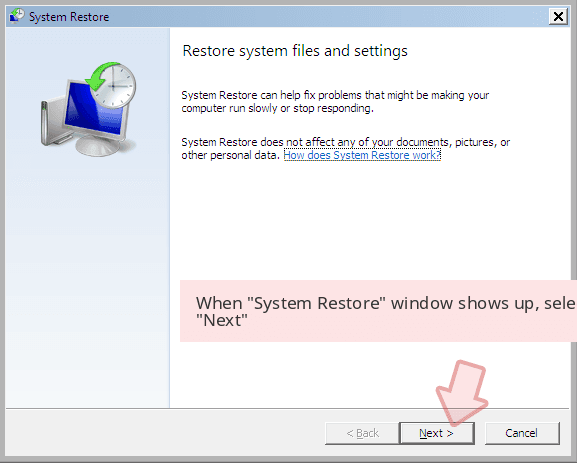
Now users need to Click on Next option and Choose restore point that was the last time Windows was working fine prior to Gen:[email protected]@aacXZjni infection. Once done, Click on Next button.
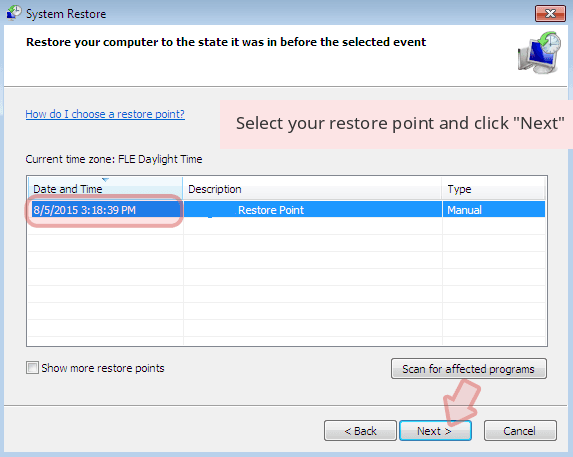
Select Yes to Restore your System and get rid of Gen:[email protected]@aacXZjni infection.

However, if the above steps does not work to remove Gen:[email protected]@aacXZjni, follow the below mentioned steps
Step:3 Unhide All Hidden Files and Folders to Delete Gen:[email protected]@aacXZjni
How to View Gen:[email protected]@aacXZjni Hidden Folders on Windows XP
- In order to show the hidden files and folders, you need to follow the given instructions:-
- Close all the Windows or minimize the opened application to go to desktop.
- Open “My Computer” by double-clicking on its icon.
- Click on Tools menu and select Folder options.
- Click on the View tab from the new Window.
- Check the Display contents of the system folders options.
- In the Hidden files and folders section, you need to put a check mark on Show hidden files and folders option.
- Click on Apply and then OK button. Now, close the Window.
- Now, you can see all the Gen:[email protected]@aacXZjni related hidden files and folders on the system.

How to Access Gen:[email protected]@aacXZjni Hidden folders on Windows Vista
- Minimize or close all opened tabs and go to Desktop.
- Go to the lower left of your screen, you will see Windows logo there, click on Start button.
- Go to Control Panel menu and click on it.
- After Control Panel got opened, there will two options, either “Classic View” or “Control Panel Home View”.
- Do the following when you are in “Classic View”.
- Double click on the icon and open Folder Options.
- Choose View tab.
- Again move to step 5.
- Do the following if you are “Control Panel Home View”.
- Hit button on Appearance and Personalization link.
- Chose Show Hidden Files or Folders.
- Under the Hidden File or Folder section, click on the button which is right next to the Show Hidden Files or Folders.
- Click on Apply button and then hit OK. Now, close the window.
- Now, to show you all hidden files or folders created by Gen:[email protected]@aacXZjni, you have successfully considered Windows Vista.

How to Unhide Gen:[email protected]@aacXZjni Created Folders on Windows 7
1. Go to the desktop and tap on the small rectangle which is located in the lower-right part of the system screen.
2. Now, just open the “Start” menu by clicking on the Windows start button which is located in the lower-left side of the PC screen that carries the windows logo.
3. Then after, look for the “Control Panel” menu option in the right-most row and open it.
4. When the Control Panel menu opens, then look for the “Folder Options” link.
5. Tap over the “View tab”.
6. Under the “Advanced Settings” category, double click on the “Hidden Files or Folders” associated with Gen:[email protected]@aacXZjni.
7. Next, just select the check-box in order to Show hidden files, folders, or drives.
8. After this, click on “Apply” >> “OK” and then close the menu.
9. Now, the Windows 7 should be configured to show you all hidden files, folders or drives.

Steps to Unhide Gen:[email protected]@aacXZjni related Files and Folders on Windows 8
- First of all, power on your Windows PC and click on start logo button that is found in left side of the system screen.
- Now, move to program lists and select control panel app.
- When Control panel is open completely, click on more settings option.
- After, you will see a Control panel Window and then you choose “Appearance and Personalization” tab.
- In Advance settings dialogue box, you need to tick mark on Show hidden files and folders and clear the check box for Hide protected system files.
- Click on Apply and Ok button. This apply option helps you to detect and eradicate all types of Gen:[email protected]@aacXZjni related suspicious files.
- Finally, navigate your mouse cursor on close option to exit this panel.
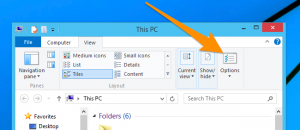
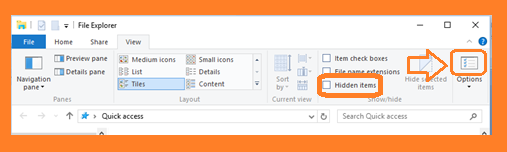
How to View Gen:[email protected]@aacXZjni associated folders on Windows 10
1. Open the folder if you wish to unhide files.
2. Search and Click on View in Menu bar
3. In Menu click on to view folder options.
4. Again click on View and Enable Radio Button associated with Show hidden files created by Gen:[email protected]@aacXZjni, folder and drive.
5. Press apply and OK.
Step 4: Press Start Key along with R- copy + paste the below stated command and Click on OK
notepad %windir%/system32/Drivers/etc/hosts
- This will open up a new file, in case if your system has been hacked, some IP’s will be shown at the bottom of the screen

Click on the Start Menu, Input “Control Panel” in the search box —> Select. Network and Internet —> Network and Sharing Center —> Next Change Adapter Settings. Right-click your Internet connection —> Select on Properties.
- In case if you find Suspicious IP in the local host –or if you are finding it difficult and have any problem then submit question to us and we will be happy to help you.


Related Posts
 Remove PyXie Trojan from Windows 10 : Take Down PyXie Trojan
- Killua Backdoor Uninstallation: Tutorial To Delete Killua Backdoor In Just Few Steps
- Remove Gon Malware from Windows 7
- EYE Malware Removal: Help To Remove EYE Malware Completely
- Delete CSPY Downloader Manually
- Possible Steps For Deleting Win32/Bundpil from Windows 10