Are you facing with Windows update error code 80072EE2? Unable to fix such an issue? Looking for an easy and effective tips to fix Windows update error code 80072EE2? If yes then your search definitely ends here. This post is mainly created to help Windows users to fix Windows update error code 80072EE2, so keep reading this post completely.

Crucial Facts That You Must Know About Windows update error code 80072EE2

Windows update error code 80072EE2 is actually a Windows update error code faced by almost all Windows users while updating their Operating System. Most of cases, it occurs when files on System PC stored are corrupt or updates get stuck. The appearances of such an error message clearly indicates that Windows update servers are overloaded with the users requests for System updater. Such an error message is common in all version of Windows PC like Error Code 0xc0000185
Instruction To Fix Windows Update Error Code 80072EE2
Method 1 : Run the Windows Update Troubleshooter
- Launch Control Panel of your Windows PC.
- Choose “Troubleshooting” option.
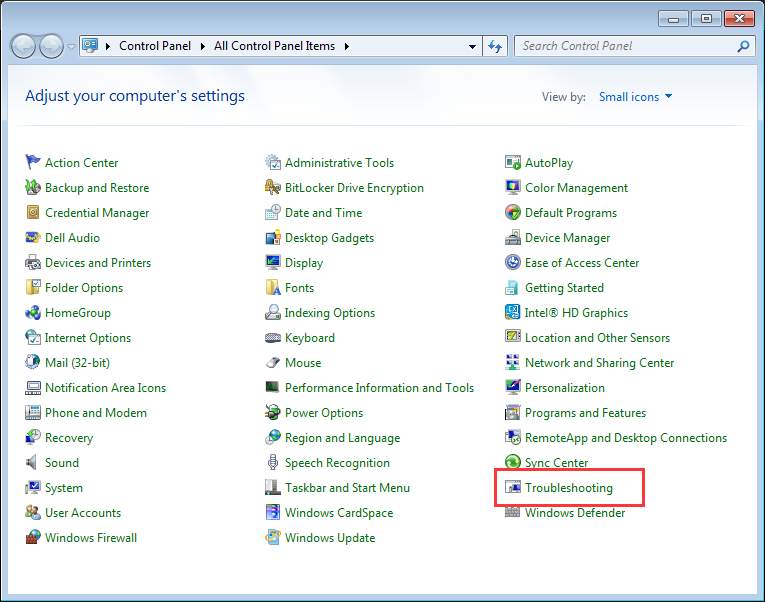
- Under the System and Security, choose an option “Fix problems with Windows Update”.

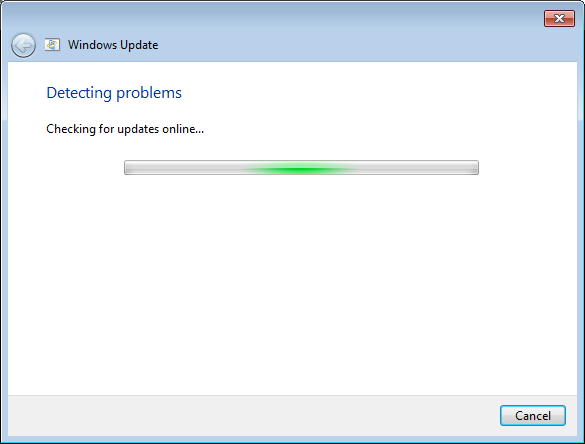
- On the next window, click on Next button.

- Now you will see that the Troubleshooter will immediately start for detecting issues.
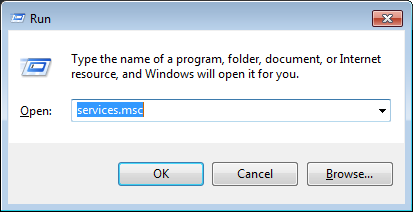
Method 2 : Stop the services of Windows Update
- Open the run command box, by pressing Win+R keys together.
- In the open Search box, type services.msc and then click on OK button.
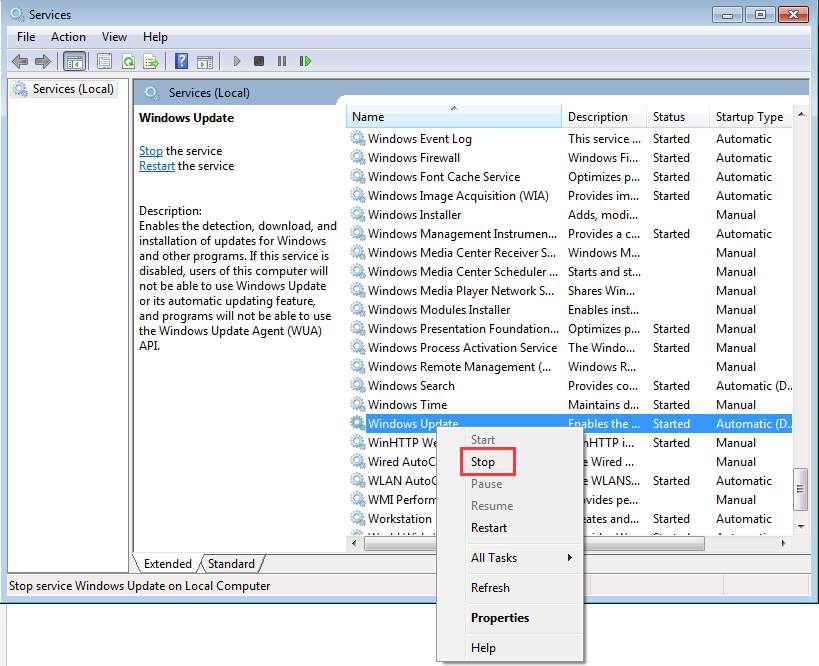
- In Locate the Windows Update service, in services control panel.
- On the next window, right click on Windows Update service and then choose option of “Stop”.
Method 3 : Delete Automatic Update Server settings From Registry
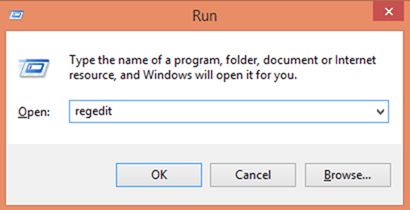
- Go to Start > Run box.
- In the Run box, type regedit and hit on enter key.
- Now registry folder will be opened.
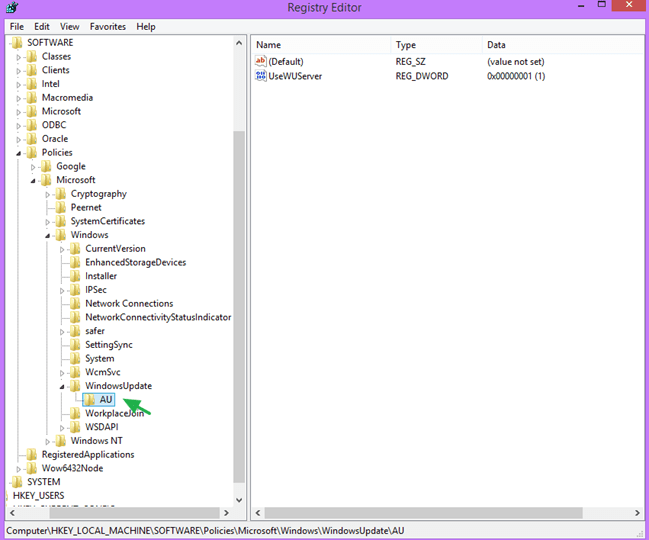
- In registry editor, browse to folder in the left hand panel to the select HKEY_LOCAL_MACHINE\SOFTWARE\Policies\Microsoft\Windows\WindowsUpdate folder
- From the right hand pane, select WUServer and WIStatusServer and delete the keys.
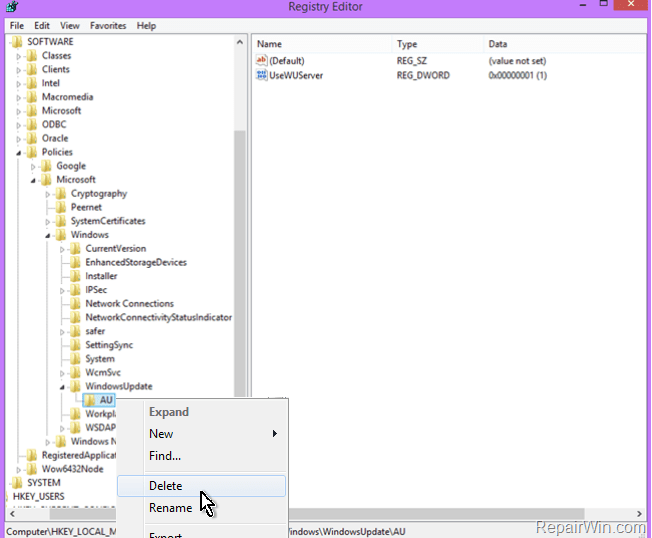
- At last restart your PC.
Method 4: Delete SoftwareDistribution Folder
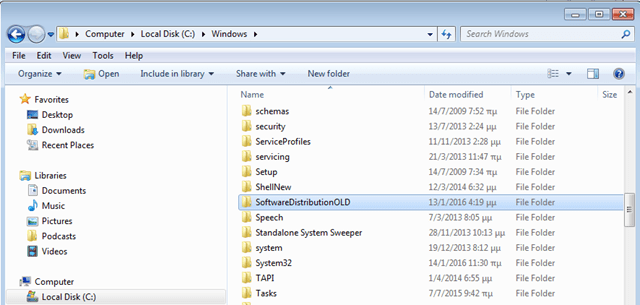
- First of all, open Windows Explorer
- Navigate to: C:\Windows folder.
- Find “SoftwareDistribution” folder and delete it.
You might also visit URL, to fix Windows 10 brightness control not working Issue – http://www.removemalwarevirus.com/tips-fix-windows-10-brightness-control-not-working-issue
Related Posts
 New AgeLocker Ransomware Abuses Legit ‘Age’ Encryption Tool
 Five Ways to Check If a Website Is Safe?
 Resolve The Recycle Bin on C:/ is corrupted Error on Windows 10
 (Resolved) Headphones Not Working In Windows 10
 Best Method To Fix The Javaw.exe Error On Windows
 (Resolved) 0X000000A5 Blue Screen Stop Error on Windows