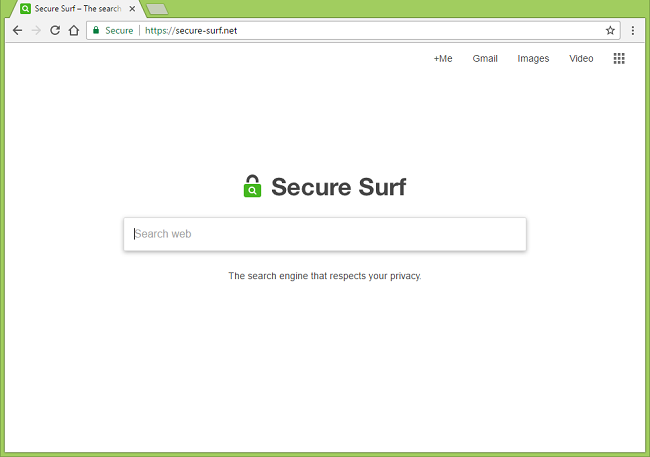
Secure-surf.net: Is It Safe to Use?

Analysis report reveals that Secure-surf.net is an unsafe search portal, released in December 2016, currently being hosted on 198.105.208.199 from Utah, Salt Lake City, has only 38 % of SEO score. Evidently, this deceptive search engine is incapable of providing relevant results to your queries. Primarily, it is focused on displaying revenue generating ads on even search result page and mislead users into purchasing or subscribing low quality products or services. Further, you should note that Secure-surf.net (aka Secure-surf.com) works as an ad-revenue oriented app but introduced as a legitimate search engine to Internet users at the time of online promotion. When you make search using this portal, you can see that it attempts to redirect your infected browsers through numerous unsafe websites until it finally reach on a custom Yahoo search page.
Secure-surf.net has abilities of browser hijacker, so it will read temporary files created by Cookies (online activities tracking technology) which contain raw data of your browsing history. It collects personal identifying information such as name, email, phone number, most visited websites URLs, Geo-location, IP address and much more from the raw data and creates an INI extension file and send it interested third parties via remote servers. We have to mention that it also changes your browsers proxy settings and creates scheduled task to start its malicious processes automatically. It doesn't matter how many times you restart your computer it will surely not stop Secure-surf.net hijacker from performing annoying activities such as tracking your online session, displaying creepy ads, injecting fake security alters/warnings pop ups, covering up web pages (that you visit daily) with ads having no 'Close' button.
How Does Secure-surf.net Spread?
- Bundled up with free apps like VLC player, Flash player, Java, Video Converter etc.
- Via Junk email attachments having abilities of macro-enabled document or exploit kit.
- Via Internet Relay Chat (IRC)
- Though malvertising contents uploaded on social media sites.
- Through Customized downloader or installer which use dark pattern.
Hence, you must click Custom option to block stealth installation of Secure-surf.net hijacker before proceeding freeware installation. We also suggest you to stay away from malicious activities like playing online games on untrusted sites, participating in fake online lottery or filling up forms with your personal details. Now, Secure-surf.net hijacker removal is a must, so follow given guide:
>>Free Download Secure-surf.net Scanner<<

Know How to Uninstall Secure-surf.net Manually From Windows PC
In order to do it, it is advised that, start your PC in safe mode by just following the steps:-
Step 1. Restart your computer and Press F8 button until you get the next window.

Step 2. After that on the new screen you should select Safe Mode option to continue this process.

Now Show Hidden Files As Follows :
Step 1. Go to Start Menu >> Control Panel >> Folder Option.

Step 2. Now Press View Tab >> Advance Setting category >> Hidden Files or Folders.

Step 3. Here you need to tick in Show hidden files, folder or drives.
Step 4. Finally hit Apply and then OK button and at the end close the current Window.
Time To Delete Secure-surf.net From Different Web browsers
For Google Chrome
Steps 1. Start Google Chrome and hot Menu icon at the top right corner of the screen and then select Settings option.

Step 2. Here you need to select required search provider in Search option.

Step 3. You can also manage search engine and make it your personalize setting by clicking on Make it default button.

Reset Google Chrome Now in given way:-
Step 1. Get Menu Icon >> Settings >> Reset settings >> Reset

For Mozilla Firefox:-
Step 1. Start Mozilla Firefox >> Setting icon >> Options.

Step 2. Press Search option and pick required search provider to make it default and also remove Secure-surf.net from here.

Step 3. You can also add other search option on your Mozilla Firefox.
Reset Mozilla Firefox
Step 1. Choose Settings >> Open Help Menu >> Troubleshooting >> Reset Firefox

Step 2. Again click Reset Firefox to eliminate Secure-surf.net in easy clicks.

For Internet Explorer
If you want to remove Secure-surf.net from Internet Explorer then please follow these steps.
Step 1. Start your IE browser and select Gear icon >> Manage Add-ons.

Step 2. Choose Search provider >> Find More Search Providers.

Step 3. Here you can select your preferred search engine.

Step 4. Now Press Add to Internet Explorer option >> Check out Make this my Default Search Engine Provider From Add Search Provider Window and then click Add option.

Step 5. Finally relaunch the browser to apply all modification.
Reset Internet Explorer
Step 1. Click on Gear Icon >> Internet Options >> Advance Tab >> Reset >> Tick Delete Personal Settings >> then press Reset to remove Secure-surf.net completely.

Clear browsing History and Delete All Cookies
Step 1. Start with the Internet Options >> General Tab >> Browsing History >> Select delete >> Check Website Data and Cookies and then finally Click Delete.

Know How To Fix DNS Settings
Step 1. Navigate to the bottom right corner of your desktop and right click on Network icon, further tap on Open Network and Sharing Center.

Step 2. In the View your active networks section, you have to choose Local Area Connection.

Step 3. Click Properties at the bottom of Local Area Connection Status window.

Step 4. Next you have to choose Internet Protocol Version 4 (TCP/IP V4) and then tap on Properties below.

Step 5. Finally enable the Obtain DNS server address automatically option and tap on OK button apply changes.


Well if you are still facing issues in removal of malware threats then you can feel free to ask questions. We will feel obliged to help you.

Related Posts
 ExecutiveOperation Search Removal: Best Way To Remove ExecutiveOperation Search In Simple Clicks
- Best Way To Get Rid Of IMovieSearch Search
- Delete MixedFin from Internet Explorer : Clear Away MixedFin
- Deleting Search-fine.com Manually
- Delete Search.basicgeneration.com from Opera
- Removing Spacerin Search Easily