
Are you trying to delete Search.hplayfreemusic.co New Tab from your browser but fails all the time? Then do not worry here in the post you will got all your answers and also find a quick and easy removal steps that certainly helps you to do the removal easily.
Search.hplayfreemusic.co New Tab : Technical Information
|
Name |
Search.hplayfreemusic.co New Tab |
|
Type |
Browser Hijacker |
|
Risk
|
Medium |
|
IP address |
107.22.168.47 |
|
Created |
25/09/2017 |
|
Expires |
24/09/2018 |
|
Updated |
Search.hplayfreemusic.co New Tab
25/09/2017 |
|
Symptoms |
Hijacked browsers homepage and search engine page, redirections etc. |
|
Delivery |
Infected ads, spam emails, freeware or shareware etc. |
|
Infected OS |
Windows |
You Must Know About Search.hplayfreemusic.co New Tab
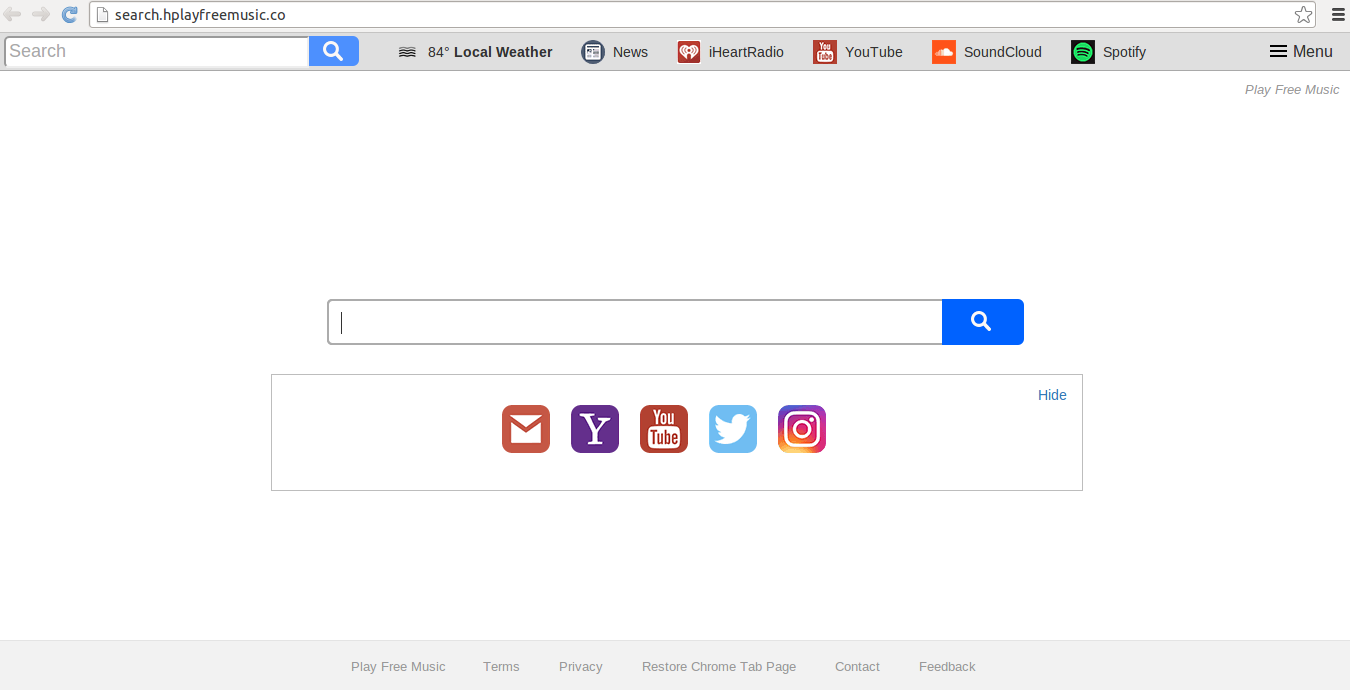
Search.hplayfreemusic.co New Tab is reportedly presented by the Play Free Music browser extension that is available for Internet browsers such as Google Chrome, Mozilla Firefox, Internet Explorer users. The Play Free Music browser extension tool has been developed by the Polarity Technologies Ltd. and promoted it as a free program that helps the users to search and listen to quality music by setting up a customized new tab page on your browsers. This new tab page allows you to select links to music service by itself. This new tab page serves as a gateway to music services such as SoundCloud, Spotify, Pandora and iHeartRadio. This a portal that provide a gateway to the third party site contents. This new tab page consist of embed search from Yahoo that makes redirections to Search.yahoo.com/yhs/search?hspart=adk&hsimp=yhs-adk_sbyhp&p=KEYWoRD. It also makes changes into the settings of browsers to make many of anyone.
Most commonly the Search.hplayfreemusic.co New Tab get inside to the systems by following several annoying infecting methods such as downloading or installing of third party free download software that uses stealth to install additional infecting software to download on the system to infect it. Several more ways through spam emails, infecting ads, suspicious sites and awful websites that my drop malware into system. After installation it deemed your browsers performance and system as well. Injects many of malvertising or advertisements on the system to bother you all the time while launches Internet browsers to visit a site or related query. So you need to remove Search.hplayfreemusic.co New Tab from system as soon as possible by using a trusted anti-malware on the system. You can also follow manual removal by following below given steps.
>>Free Download Search.hplayfreemusic.co New Tab Scanner<<

Know How to Uninstall Search.hplayfreemusic.co New Tab Manually From Windows PC
In order to do it, it is advised that, start your PC in safe mode by just following the steps:-
Step 1. Restart your computer and Press F8 button until you get the next window.

Step 2. After that on the new screen you should select Safe Mode option to continue this process.

Now Show Hidden Files As Follows :
Step 1. Go to Start Menu >> Control Panel >> Folder Option.

Step 2. Now Press View Tab >> Advance Setting category >> Hidden Files or Folders.

Step 3. Here you need to tick in Show hidden files, folder or drives.
Step 4. Finally hit Apply and then OK button and at the end close the current Window.
Time To Delete Search.hplayfreemusic.co New Tab From Different Web browsers
For Google Chrome
Steps 1. Start Google Chrome and hot Menu icon at the top right corner of the screen and then select Settings option.

Step 2. Here you need to select required search provider in Search option.

Step 3. You can also manage search engine and make it your personalize setting by clicking on Make it default button.

Reset Google Chrome Now in given way:-
Step 1. Get Menu Icon >> Settings >> Reset settings >> Reset

For Mozilla Firefox:-
Step 1. Start Mozilla Firefox >> Setting icon >> Options.

Step 2. Press Search option and pick required search provider to make it default and also remove Search.hplayfreemusic.co New Tab from here.

Step 3. You can also add other search option on your Mozilla Firefox.
Reset Mozilla Firefox
Step 1. Choose Settings >> Open Help Menu >> Troubleshooting >> Reset Firefox

Step 2. Again click Reset Firefox to eliminate Search.hplayfreemusic.co New Tab in easy clicks.

For Internet Explorer
If you want to remove Search.hplayfreemusic.co New Tab from Internet Explorer then please follow these steps.
Step 1. Start your IE browser and select Gear icon >> Manage Add-ons.

Step 2. Choose Search provider >> Find More Search Providers.

Step 3. Here you can select your preferred search engine.

Step 4. Now Press Add to Internet Explorer option >> Check out Make this my Default Search Engine Provider From Add Search Provider Window and then click Add option.

Step 5. Finally relaunch the browser to apply all modification.
Reset Internet Explorer
Step 1. Click on Gear Icon >> Internet Options >> Advance Tab >> Reset >> Tick Delete Personal Settings >> then press Reset to remove Search.hplayfreemusic.co New Tab completely.

Clear browsing History and Delete All Cookies
Step 1. Start with the Internet Options >> General Tab >> Browsing History >> Select delete >> Check Website Data and Cookies and then finally Click Delete.

Know How To Fix DNS Settings
Step 1. Navigate to the bottom right corner of your desktop and right click on Network icon, further tap on Open Network and Sharing Center.

Step 2. In the View your active networks section, you have to choose Local Area Connection.

Step 3. Click Properties at the bottom of Local Area Connection Status window.

Step 4. Next you have to choose Internet Protocol Version 4 (TCP/IP V4) and then tap on Properties below.

Step 5. Finally enable the Obtain DNS server address automatically option and tap on OK button apply changes.


Well if you are still facing issues in removal of malware threats then you can feel free to ask questions. We will feel obliged to help you.

Related Posts
 ExecutiveOperation Search Removal: Best Way To Remove ExecutiveOperation Search In Simple Clicks
- Best Way To Get Rid Of IMovieSearch Search
- Delete MixedFin from Internet Explorer : Clear Away MixedFin
- Deleting Search-fine.com Manually
- Delete Search.basicgeneration.com from Opera
- Removing Spacerin Search Easily