Investigation Report on Xml/trojan.gfpq-8

Social networks are rife with various inexperienced system users. Add to that the huge amount of traffic that the most famous social networking services receive and it is quite clear that they are specifically juicy targets of the hackers responsible for spreading Xml/trojan.gfpq-8 virus. In fact, with increased use of popular social networking websites like Facebook, Instagram, Pinterest, Twitter and the like, these type of social networks are gaining high importance in how threat actors develop and target viruses. Although, there is one particular reason why such type of networks are especially used for distributing hazardous threats, because the PC users on social networks generally are more likely to trust on displayed videos or file attachment delivered by someone they know.
Besides, this implicit trust can be result drastically and used to infect your machine with a noxious Trojan reported as Xml/trojan.gfpq-8. Such type of password stealing Trojans and other banking malware have increased their presence over the social networks in recent years. More often, these kind of viruses infecting Internet browsers to steal confidential data directly from the victim's machine. This malware is especially designed by the team of criminal hackers in order to target web browsers. It gets inside the targeted system when the victim clicks on intrusive links which is distributed through other compromised PCs. These links are often shortened in nature to hide their true destination. Since link sharing and shortening are both commonly used in social networks which attracts the users attention.
How Does Xml/trojan.gfpq-8 Work?
Once the user click on the displayed link, their machine immediate gets infected with Xml/trojan.gfpq-8 virus. It has been tricked users into downloading and installing the malicious payload of this Trojan and after that, it makes changes to the registry entries of compromised machine in order to start the malware automatically at each startup. It has the ability to connect the infected machine with a remote server to download other harmful executables for infecting installed web browsers. After these nasty files get installed onto the PC, they gain access to variety of vital system functionalities. It may download other precarious threats onto your machine without your knowledge. Hence, the cyber security experts strongly suggest the affected computer users to take immediate action for the complete removal of Xml/trojan.gfpq-8 with the help of a credible anti-malware tool provided below in this article.
>>Free Download Xml/trojan.gfpq-8 Scanner<<

Manual Xml/trojan.gfpq-8 Removal Guide
Step 1: How to Start your PC in Safe Mode with Networking to Get Rid of Xml/trojan.gfpq-8
(For Win 7 | XP | Vista Users)
- first of all PC is to be rebooted in Safe Mode with Networking
- Select on Start Button and Click on Shutdown | Restart option and select OK
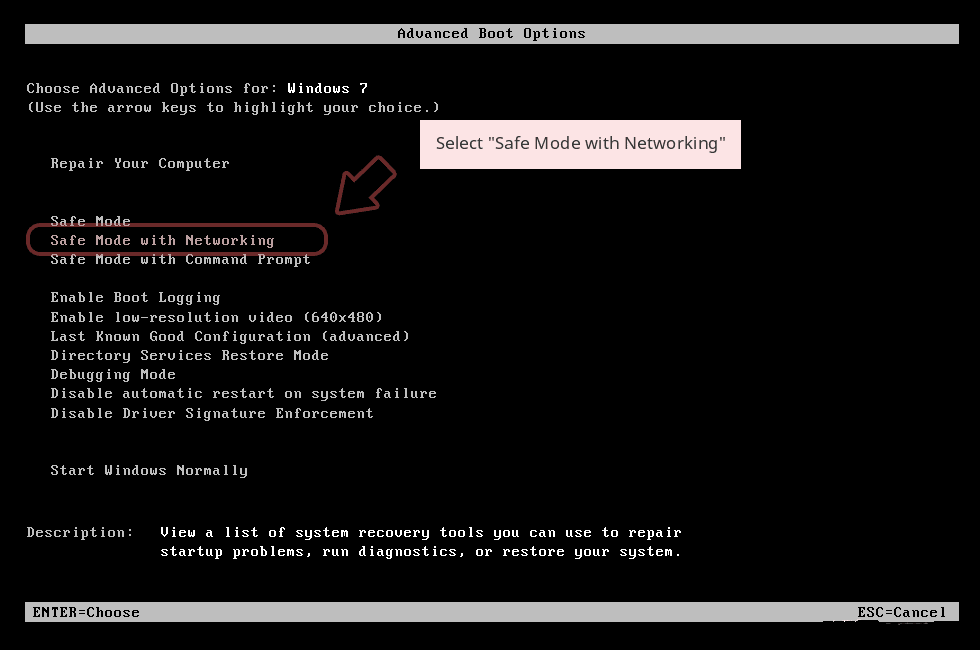
- when the PC restarts, keep tapping on F8 until you don’t get Advanced Boot Options.
- Safe Mode with Networking Option is to be selected from the list.
(For Win 8 | 8.1 | Win 10 Users)
- Click on Power Button near Windows Login Screen
- Keep Shift Button on the keyboard pressed and select Restart Option
- Now Select on Enable Safe Mode with Networking Option

In case Xml/trojan.gfpq-8, is not letting your PC to Start in Safe Mode, then following Step is to followed
Step 2: Remove Xml/trojan.gfpq-8 Using System Restore Process
- PC need to be rebooted to Safe Mode with Command Prompt
- As soon as Command Prompt Window appear on the screen, select on cd restore and press on Enter option
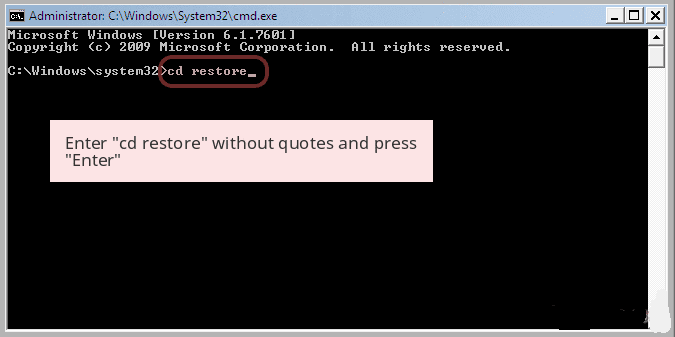
Type rstrui.exe and Click on Enter again.

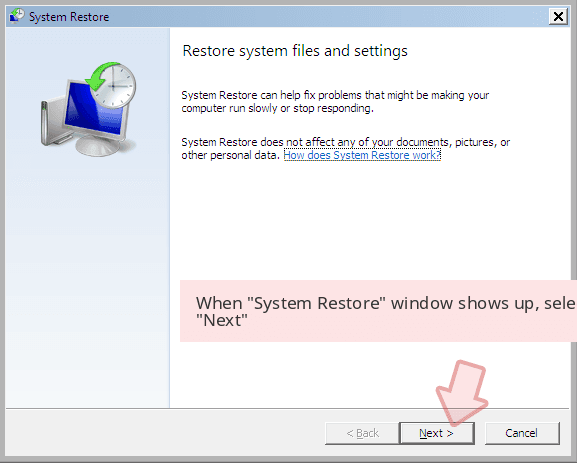
Now users need to Click on Next option and Choose restore point that was the last time Windows was working fine prior to Xml/trojan.gfpq-8 infection. Once done, Click on Next button.
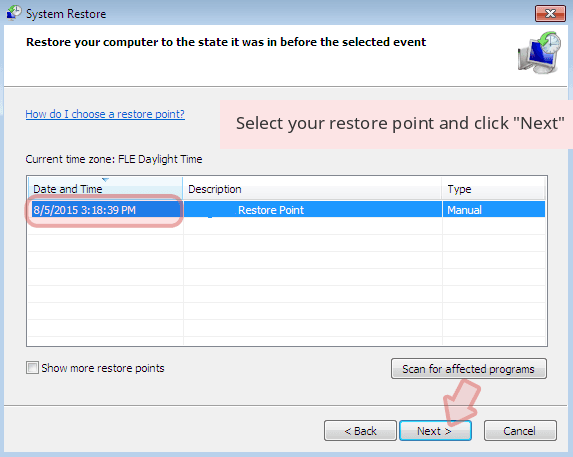
Select Yes to Restore your System and get rid of Xml/trojan.gfpq-8 infection.

However, if the above steps does not work to remove Xml/trojan.gfpq-8, follow the below mentioned steps
Step:3 Unhide All Hidden Files and Folders to Delete Xml/trojan.gfpq-8
How to View Xml/trojan.gfpq-8 Hidden Folders on Windows XP
- In order to show the hidden files and folders, you need to follow the given instructions:-
- Close all the Windows or minimize the opened application to go to desktop.
- Open “My Computer” by double-clicking on its icon.
- Click on Tools menu and select Folder options.
- Click on the View tab from the new Window.
- Check the Display contents of the system folders options.
- In the Hidden files and folders section, you need to put a check mark on Show hidden files and folders option.
- Click on Apply and then OK button. Now, close the Window.
- Now, you can see all the Xml/trojan.gfpq-8 related hidden files and folders on the system.

How to Access Xml/trojan.gfpq-8 Hidden folders on Windows Vista
- Minimize or close all opened tabs and go to Desktop.
- Go to the lower left of your screen, you will see Windows logo there, click on Start button.
- Go to Control Panel menu and click on it.
- After Control Panel got opened, there will two options, either “Classic View” or “Control Panel Home View”.
- Do the following when you are in “Classic View”.
- Double click on the icon and open Folder Options.
- Choose View tab.
- Again move to step 5.
- Do the following if you are “Control Panel Home View”.
- Hit button on Appearance and Personalization link.
- Chose Show Hidden Files or Folders.
- Under the Hidden File or Folder section, click on the button which is right next to the Show Hidden Files or Folders.
- Click on Apply button and then hit OK. Now, close the window.
- Now, to show you all hidden files or folders created by Xml/trojan.gfpq-8, you have successfully considered Windows Vista.

How to Unhide Xml/trojan.gfpq-8 Created Folders on Windows 7
1. Go to the desktop and tap on the small rectangle which is located in the lower-right part of the system screen.
2. Now, just open the “Start” menu by clicking on the Windows start button which is located in the lower-left side of the PC screen that carries the windows logo.
3. Then after, look for the “Control Panel” menu option in the right-most row and open it.
4. When the Control Panel menu opens, then look for the “Folder Options” link.
5. Tap over the “View tab”.
6. Under the “Advanced Settings” category, double click on the “Hidden Files or Folders” associated with Xml/trojan.gfpq-8.
7. Next, just select the check-box in order to Show hidden files, folders, or drives.
8. After this, click on “Apply” >> “OK” and then close the menu.
9. Now, the Windows 7 should be configured to show you all hidden files, folders or drives.

Steps to Unhide Xml/trojan.gfpq-8 related Files and Folders on Windows 8
- First of all, power on your Windows PC and click on start logo button that is found in left side of the system screen.
- Now, move to program lists and select control panel app.
- When Control panel is open completely, click on more settings option.
- After, you will see a Control panel Window and then you choose “Appearance and Personalization” tab.
- In Advance settings dialogue box, you need to tick mark on Show hidden files and folders and clear the check box for Hide protected system files.
- Click on Apply and Ok button. This apply option helps you to detect and eradicate all types of Xml/trojan.gfpq-8 related suspicious files.
- Finally, navigate your mouse cursor on close option to exit this panel.
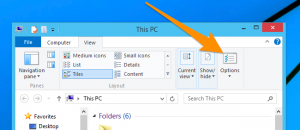
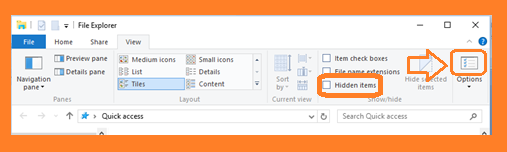
How to View Xml/trojan.gfpq-8 associated folders on Windows 10
1. Open the folder if you wish to unhide files.
2. Search and Click on View in Menu bar
3. In Menu click on to view folder options.
4. Again click on View and Enable Radio Button associated with Show hidden files created by Xml/trojan.gfpq-8, folder and drive.
5. Press apply and OK.
Step 4: Press Start Key along with R- copy + paste the below stated command and Click on OK
notepad %windir%/system32/Drivers/etc/hosts
- This will open up a new file, in case if your system has been hacked, some IP’s will be shown at the bottom of the screen

Click on the Start Menu, Input “Control Panel” in the search box —> Select. Network and Internet —> Network and Sharing Center —> Next Change Adapter Settings. Right-click your Internet connection —> Select on Properties.
- In case if you find Suspicious IP in the local host –or if you are finding it difficult and have any problem then submit question to us and we will be happy to help you.


Related Posts
 Remove PyXie Trojan from Windows 10 : Take Down PyXie Trojan
- Killua Backdoor Uninstallation: Tutorial To Delete Killua Backdoor In Just Few Steps
- Remove Gon Malware from Windows 7
- EYE Malware Removal: Help To Remove EYE Malware Completely
- Delete CSPY Downloader Manually
- Possible Steps For Deleting Win32/Bundpil from Windows 10