
Getting a warning message that system is executing out of room is really a very stressful moment or an emergency if you are in middle of an important project. If you are also one of the Windows user and getting such an error message then no need to be panic because with the help of this post you can easily free up hard disk space on Windows. So, keep reading this post completely.
Effective Tips To Free Up Hard Disk Space On Windows
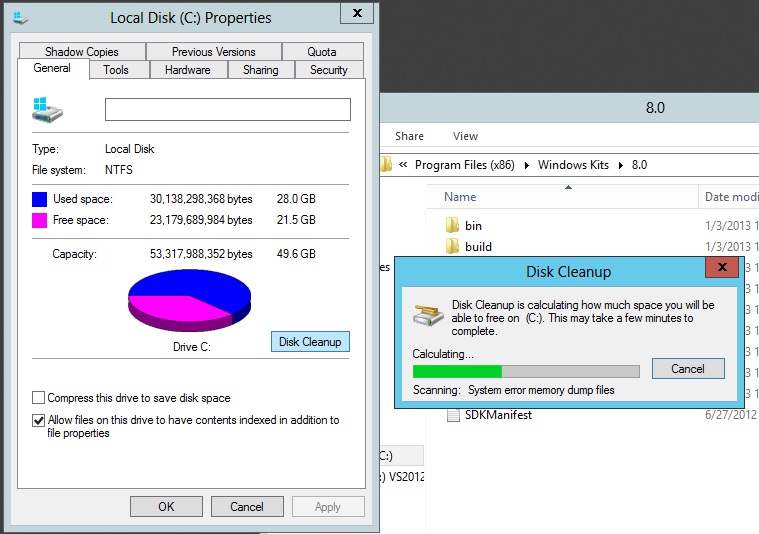
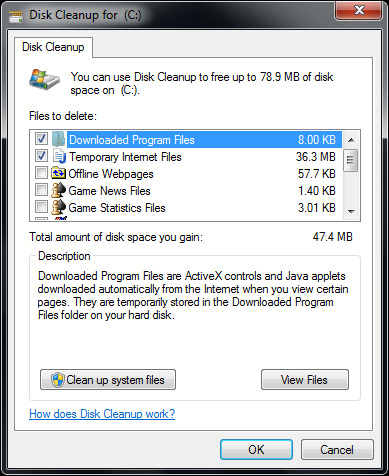
Tips 1 : Execute Disk Cleanup
- Go to File, right-click on C: drive and then after select Properties option.
- Go to General tab and then after click on Disk Cleanup.
- Now, you have to wait for the Windows to hunt down recycle bin items, temporary files and anything.
- After finishing the procedure, you will notice that several files are marked for deletion.
- Choose Clean up system files option.
- In the next window under the System Restore and Shadow Copies, click on the Clean up option.
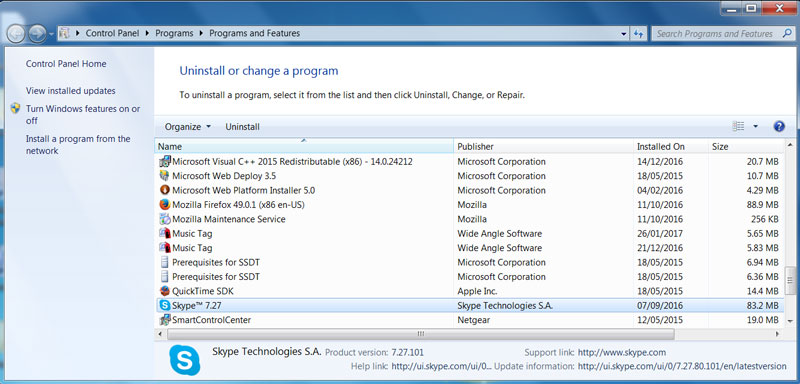
Tips 2 : Uninstall Unnecessary or Unwanted Programs
- Go to Start > Control Panel and Uninstall a program option.
- Now, sort the list of System programs based on file size by clicking on ‘Size header’.
- With this option, you can easily notice which programs consumes more space on PC.
- On the next window, you have to click on any program that you really want to delete and then after click on ‘Uninstall’ option.
Tips 3 : Empty The Recycle Bin
Deletion of any items such as files, photos and other from PC don’t get deleted immediately. All of them are sit in Recycle Bin and then after they continue to take up user’s valuable hard-drive space. Therefore, it is necessary to emptied the Recycle Bin. To empty the recycle bin, you must follow these steps :
- Go to desktop.
- Right-click on Recycle bin
- Click on the Empty Recycle Bin option.
- If you are prompted with a confirmation message then you must click on Yes button for further proceeding.
![]()
Tips 4 : Delete Temporary and Downloaded Files
- Go to Settings > System.
- On the next window, click on Storage that appeared on left panel.
- Next, click on My Computer or This PC which is usually located at the top of screen and then after click on Temporary files.
- Now, check the boxes for Downloads folder and Temporary files.
- After that click on Remove files button.
Tips 5 : Configure Storage Sense
- Go to Settings.
- On the next window, click on System > Storage.
- Under the Storage Sense, click on link ‘Change how we free up space automatically’.
- From the drop-down menu, use option of Run Storage Sense and choose one of the following including Every day, Every week, Every month, When Windows decides etc.
- Upon the successful completion of procedure, the Storage sense will automatically execute depending on your configuration.

Related Posts
 New AgeLocker Ransomware Abuses Legit ‘Age’ Encryption Tool
 Five Ways to Check If a Website Is Safe?
 Resolve The Recycle Bin on C:/ is corrupted Error on Windows 10
 (Resolved) Headphones Not Working In Windows 10
 Best Method To Fix The Javaw.exe Error On Windows
 (Resolved) 0X000000A5 Blue Screen Stop Error on Windows