
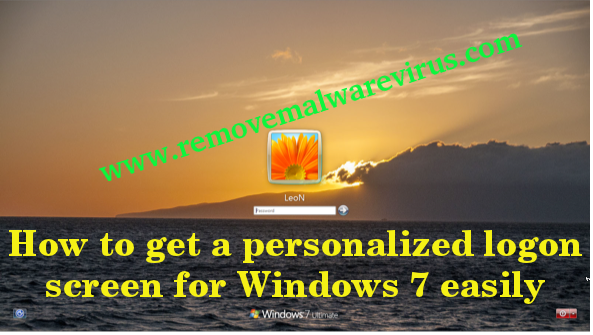
This page describes all essential instruction which is required to get a personalized logon screen for Windows 7. By using this guide, you will know how can you change the background image of your Windows 7 PC while attempting to sign into it. So, keep reading this guide and carry out the instruction in exact order.
Know About Windows 7 OS
Windows 7 is one of the popular version of Windows Operating System from Microsoft that featured with several excellence features. Just because of it’s simple design and too much easier functionality, almost all user want to use Windows 7 OS. This Operating System is undoubtedly packed with various excellence features but the most noticeable fact is that it allows user to change login screen without use of any external software. To know how, you can get a personalized logon screen for Windows 7, keep reading this post till the end.
Steps to get a personalized logon screen for Windows 7
-
- Start your Windows 7 PC.
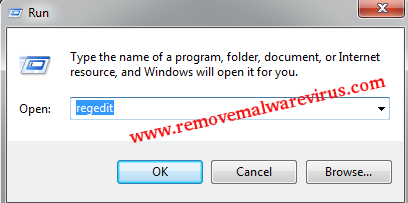
- Press Win+R key, to open Run box.
- In the opened Run dialog box, input regedit and press on OK button.
-
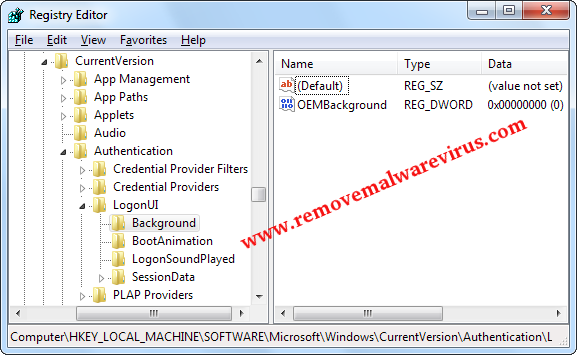
- On next, find HKEY_LOCAL_MACHINE > Software> Microsoft > Windows > CurrentVersion > Authentication > LogonUI > Background
- After that double-click on OEMBackground.
-
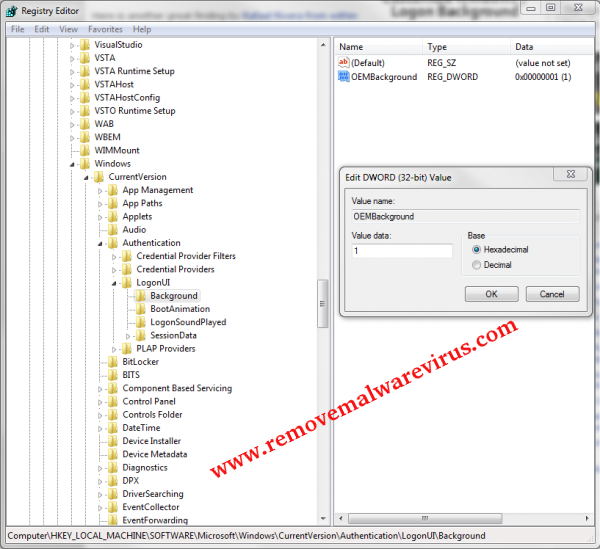
- Now, change value data to 1.
- After changing value data, click on OK button.
- Close the opened regedit window.
- Now, you have to open My Computer or Windows Explorer and navigate to the Windows directory.
- In system32 folder in the Windows directory, create new folders.
- Put your desired images in newly created folder. But be ensure that the image size must be less that 256kb in size.
- Now, it’s time to check whether your system background is working properly or not.
- By pressing Win+L key, lock your screen.
- This actions will display your desired image on logon screen of Windows 7.
Related Posts
 New AgeLocker Ransomware Abuses Legit ‘Age’ Encryption Tool
 Five Ways to Check If a Website Is Safe?
 Resolve The Recycle Bin on C:/ is corrupted Error on Windows 10
 (Resolved) Headphones Not Working In Windows 10
 Best Method To Fix The Javaw.exe Error On Windows
 (Resolved) 0X000000A5 Blue Screen Stop Error on Windows