| 19D67Tgb3neJiTHd8pZDEBYmUn2qSjxEeB is a Backdoor | |
| Trojan Dropped by 19D67Tgb3neJiTHd8pZDEBYmUn2qSjxEeB are Vbcrypt.BO, Trojan.Downloader.Carberp.R, I-Worm.Anel, Ceyda Demet Worm, Virus.DelfInject.gen!AX, Trojan.Artilyb, Sality.AH.dll, Virus.Smallrk.F, Abfewsm.A, Reoxtan, Spy.Ardamax.axr | |
| Related spyware Worm.Randex, RemEye, RaptorDefence, Worm.Storm, Trojan.Apmod, Worm.NetSky, Accoona, Qakbot, Remote Password Stealer | |
| Windows Error caused by 19D67Tgb3neJiTHd8pZDEBYmUn2qSjxEeB are – 0x80240007 WU_E_INVALIDINDEX The index to a collection was invalid., 0x8024000D WU_E_XML_MISSINGDATA Windows Update Agent could not find required information in the update’s XML data., Error 0x80070652, 0x80248000 WU_E_DS_SHUTDOWN An operation failed because Windows Update Agent is shutting down., 0x000000EB, 0xf0801 CBS_E_NOT_INITIALIZED session not initialized, 0x0000009B, 0xf0807 CBS_E_NOT_INSTALLABLE the component referenced is not separately installable | |
| 19D67Tgb3neJiTHd8pZDEBYmUn2qSjxEeB infects these windows .dll files smimsgif.dll, MpRtPlug.dll, System.ComponentModel.DataAnnotations.dll, Microsoft.MediaCenter.Shell.dll, alink.dll, Mslwvtts.dll, IEAdvpack.dll, printfilterpipelineprxy.dll, wmipcima.dll, Mcx2Filter.dll, networkinspection.dll |
19D67Tgb3neJiTHd8pZDEBYmUn2qSjxEeB may have entered your pc through these software. If you have not installed them , then get rid of them All My Patients Viewer 1.30 , wasd 1.0 , mReplay 0.69h , Finder Activator 1.0 , iPhone Data Recovery , Little Hopper’s Memory Matching Game 1.2.1 , Blood & Glory 1.0.3 , Payload Extractor 1.2 , Jaksta Music Miner 1.2.3 , DeskBrowse 1.0 , Fuel Economy Calculator 1.0.1 , Power Structure 1.8 , Hue-topia 1.6.5 , Pong Remix 1.1.0 , RPG Patsy 4.5.5 , GrubHub.com 2.0 , Fone Rescue 4.1.2 , PocketDock 2.5.5 |
|


19D67Tgb3neJiTHd8pZDEBYmUn2qSjxEeB : How To Remove? (Deletion Guide)
Latest Research Report On 19D67Tgb3neJiTHd8pZDEBYmUn2qSjxEeB
- Name: 19D67Tgb3neJiTHd8pZDEBYmUn2qSjxEeB
- Type: Trojan
- Alert Level: Medium
- Infection Length: Varies
- Affected PCs: Windows Operating System
What Is Known About 19D67Tgb3neJiTHd8pZDEBYmUn2qSjxEeB?
19D67Tgb3neJiTHd8pZDEBYmUn2qSjxEeB is one of the most noxious Trojan virus which mainly affects poorly protected Windows based computers. It often use masks in order to trick unwary system users into clicking infectious links and download rogue programs or files onto their machine. These types of Trojan downloaders has the ability to exploit scripting in the back-end for downloading malicious files or applications automatically onto the user’s system with just a visit to the phishing website in which 19D67Tgb3neJiTHd8pZDEBYmUn2qSjxEeB is housed. Besides, it is able to deactivate weaker anti-virus softwares, bypass the firewalls and often remains active in the computer’s background while the victimized users works unaware of this Trojan being installed on their machine.
Furthermore, it can cleverly modify the system’s default configuration settings and modify the registry entries so that the harmful executables can run every time whenever Windows is loaded. Manual removal of 19D67Tgb3neJiTHd8pZDEBYmUn2qSjxEeB virus may be possible. Although, malicious components and files of this Trojan may be renamed to look like same as legitimate operating system elements. It may also hook the legitimate running processes into circumvent activity. Therefore, to avoid deleting the wrong computer files and affecting the system’s hard drive, you should use a professional anti-malware solution which containing an anti-rookit algorithm that can easily and safely remove 19D67Tgb3neJiTHd8pZDEBYmUn2qSjxEeB virus and all its associated hidden malwares as well.
Spam Emails Allow 19D67Tgb3neJiTHd8pZDEBYmUn2qSjxEeB To Spread On The Web
According to the malware researchers, this malware is most frequently proliferated through malspam campaign. Typically, it is disclosed in the form of a file or document which claims to be from a shipping company and usually arrives on spam folder of your mailbox. However, you should clicking on any links or downloading and opening files attached to such emails because it may lead to the invasion of most dangerous 19D67Tgb3neJiTHd8pZDEBYmUn2qSjxEeB virus on your computer. Besides, it can use fake software updates or infected advertisements to get installed on a targeted machine. In case, if you find the traces of this malware on your PC, then take immediate action for 19D67Tgb3neJiTHd8pZDEBYmUn2qSjxEeB removal.
Manual 19D67Tgb3neJiTHd8pZDEBYmUn2qSjxEeB Removal Guide
Step 1: How to Start your PC in Safe Mode with Networking to Get Rid of 19D67Tgb3neJiTHd8pZDEBYmUn2qSjxEeB
(For Win 7 | XP | Vista Users)
- first of all PC is to be rebooted in Safe Mode with Networking
- Select on Start Button and Click on Shutdown | Restart option and select OK
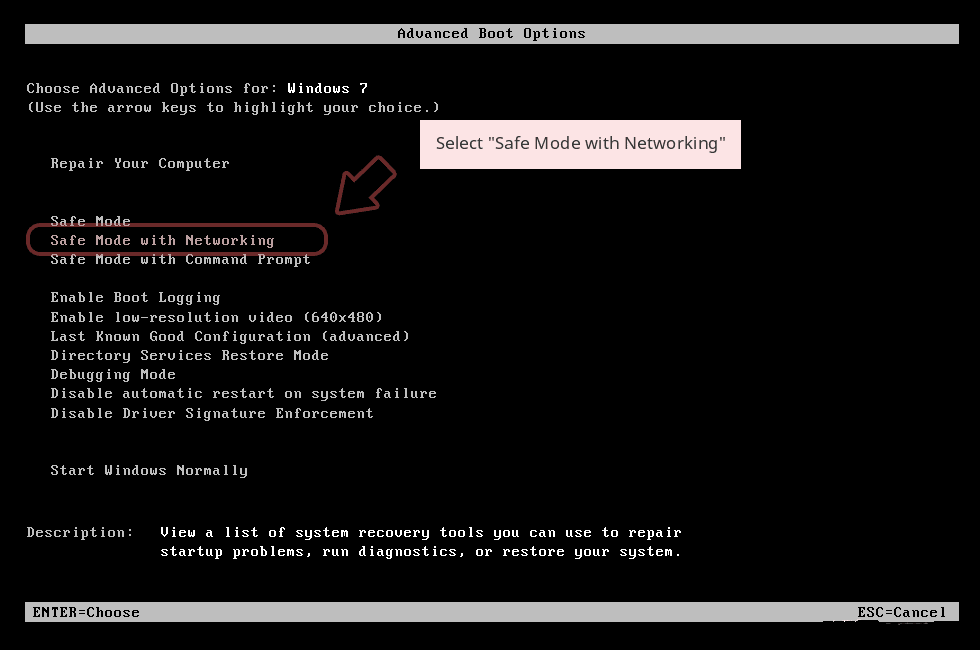
- when the PC restarts, keep tapping on F8 until you don’t get Advanced Boot Options.
- Safe Mode with Networking Option is to be selected from the list.
(For Win 8 | 8.1 | Win 10 Users)
- Click on Power Button near Windows Login Screen
- Keep Shift Button on the keyboard pressed and select Restart Option
- Now Select on Enable Safe Mode with Networking Option

In case 19D67Tgb3neJiTHd8pZDEBYmUn2qSjxEeB, is not letting your PC to Start in Safe Mode, then following Step is to followed
Step 2: Remove 19D67Tgb3neJiTHd8pZDEBYmUn2qSjxEeB Using System Restore Process
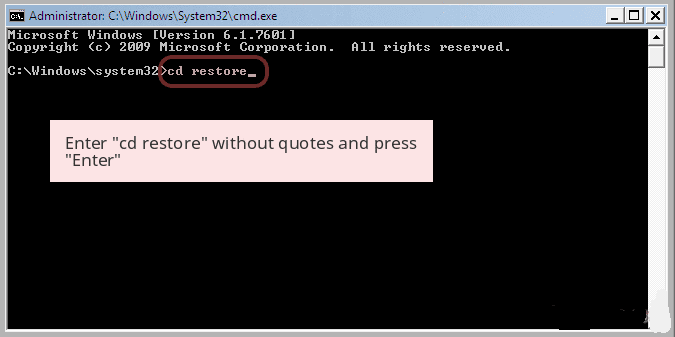
- PC need to be rebooted to Safe Mode with Command Prompt
- As soon as Command Prompt Window appear on the screen, select on cd restore and press on Enter option
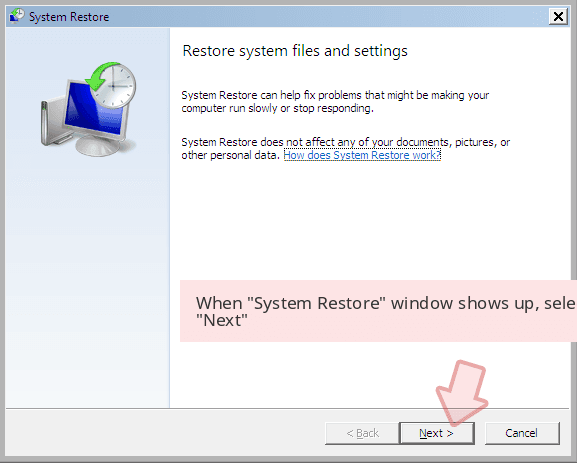
Type rstrui.exe and Click on Enter again.

Now users need to Click on Next option and Choose restore point that was the last time Windows was working fine prior to 19D67Tgb3neJiTHd8pZDEBYmUn2qSjxEeB infection. Once done, Click on Next button.
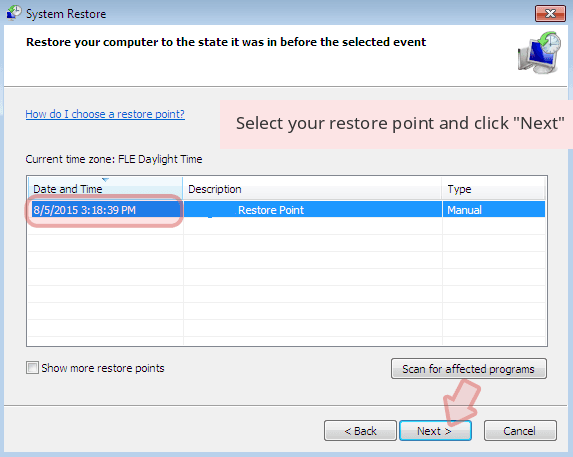
Select Yes to Restore your System and get rid of 19D67Tgb3neJiTHd8pZDEBYmUn2qSjxEeB infection.

However, if the above steps does not work to remove 19D67Tgb3neJiTHd8pZDEBYmUn2qSjxEeB, follow the below mentioned steps
Step:3 Unhide All Hidden Files and Folders to Delete 19D67Tgb3neJiTHd8pZDEBYmUn2qSjxEeB
How to View 19D67Tgb3neJiTHd8pZDEBYmUn2qSjxEeB Hidden Folders on Windows XP
- In order to show the hidden files and folders, you need to follow the given instructions:-
- Close all the Windows or minimize the opened application to go to desktop.
- Open “My Computer” by double-clicking on its icon.
- Click on Tools menu and select Folder options.
- Click on the View tab from the new Window.
- Check the Display contents of the system folders options.
- In the Hidden files and folders section, you need to put a check mark on Show hidden files and folders option.
- Click on Apply and then OK button. Now, close the Window.
- Now, you can see all the 19D67Tgb3neJiTHd8pZDEBYmUn2qSjxEeB related hidden files and folders on the system.

How to Access 19D67Tgb3neJiTHd8pZDEBYmUn2qSjxEeB Hidden folders on Windows Vista
- Minimize or close all opened tabs and go to Desktop.
- Go to the lower left of your screen, you will see Windows logo there, click on Start button.
- Go to Control Panel menu and click on it.
- After Control Panel got opened, there will two options, either “Classic View” or “Control Panel Home View”.
- Do the following when you are in “Classic View”.
- Double click on the icon and open Folder Options.
- Choose View tab.
- Again move to step 5.
- Do the following if you are “Control Panel Home View”.
- Hit button on Appearance and Personalization link.
- Chose Show Hidden Files or Folders.
- Under the Hidden File or Folder section, click on the button which is right next to the Show Hidden Files or Folders.
- Click on Apply button and then hit OK. Now, close the window.
- Now, to show you all hidden files or folders created by 19D67Tgb3neJiTHd8pZDEBYmUn2qSjxEeB, you have successfully considered Windows Vista.

How to Unhide 19D67Tgb3neJiTHd8pZDEBYmUn2qSjxEeB Created Folders on Windows 7
1. Go to the desktop and tap on the small rectangle which is located in the lower-right part of the system screen.
2. Now, just open the “Start” menu by clicking on the Windows start button which is located in the lower-left side of the PC screen that carries the windows logo.
3. Then after, look for the “Control Panel” menu option in the right-most row and open it.
4. When the Control Panel menu opens, then look for the “Folder Options” link.
5. Tap over the “View tab”.
6. Under the “Advanced Settings” category, double click on the “Hidden Files or Folders” associated with 19D67Tgb3neJiTHd8pZDEBYmUn2qSjxEeB.
7. Next, just select the check-box in order to Show hidden files, folders, or drives.
8. After this, click on “Apply” >> “OK” and then close the menu.
9. Now, the Windows 7 should be configured to show you all hidden files, folders or drives.

Steps to Unhide 19D67Tgb3neJiTHd8pZDEBYmUn2qSjxEeB related Files and Folders on Windows 8
- First of all, power on your Windows PC and click on start logo button that is found in left side of the system screen.
- Now, move to program lists and select control panel app.
- When Control panel is open completely, click on more settings option.
- After, you will see a Control panel Window and then you choose “Appearance and Personalization” tab.
- In Advance settings dialogue box, you need to tick mark on Show hidden files and folders and clear the check box for Hide protected system files.
- Click on Apply and Ok button. This apply option helps you to detect and eradicate all types of 19D67Tgb3neJiTHd8pZDEBYmUn2qSjxEeB related suspicious files.
- Finally, navigate your mouse cursor on close option to exit this panel.
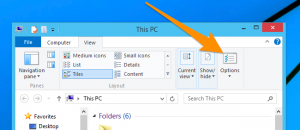
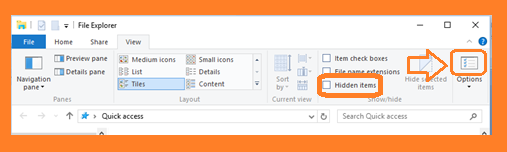
How to View 19D67Tgb3neJiTHd8pZDEBYmUn2qSjxEeB associated folders on Windows 10
1. Open the folder if you wish to unhide files.
2. Search and Click on View in Menu bar
3. In Menu click on to view folder options.
4. Again click on View and Enable Radio Button associated with Show hidden files created by 19D67Tgb3neJiTHd8pZDEBYmUn2qSjxEeB, folder and drive.
5. Press apply and OK.
Step 4: Press Start Key along with R- copy + paste the below stated command and Click on OK
notepad %windir%/system32/Drivers/etc/hosts
- This will open up a new file, in case if your system has been hacked, some IP’s will be shown at the bottom of the screen

Click on the Start Menu, Input “Control Panel” in the search box —> Select. Network and Internet —> Network and Sharing Center —> Next Change Adapter Settings. Right-click your Internet connection —> Select on Properties.
- In case if you find Suspicious IP in the local host –or if you are finding it difficult and have any problem then submit question to us and we will be happy to help you.

Related Posts
 Remove PyXie Trojan from Windows 10 : Take Down PyXie Trojan
- Killua Backdoor Uninstallation: Tutorial To Delete Killua Backdoor In Just Few Steps
- Remove Gon Malware from Windows 7
- EYE Malware Removal: Help To Remove EYE Malware Completely
- Delete CSPY Downloader Manually
- Possible Steps For Deleting Win32/Bundpil from Windows 10