
If you are searching from your browsers address bar and your search results are being redirected through a website Houghink.com then it might installed an unwanted browser extension tool or add-on on your system. Your searches then after goes from Houghink.com to Google.com. Then if you are thinking about the removal then follow the following post. It will certainly help you.
What should yo know about the hijacker Houghink.com?
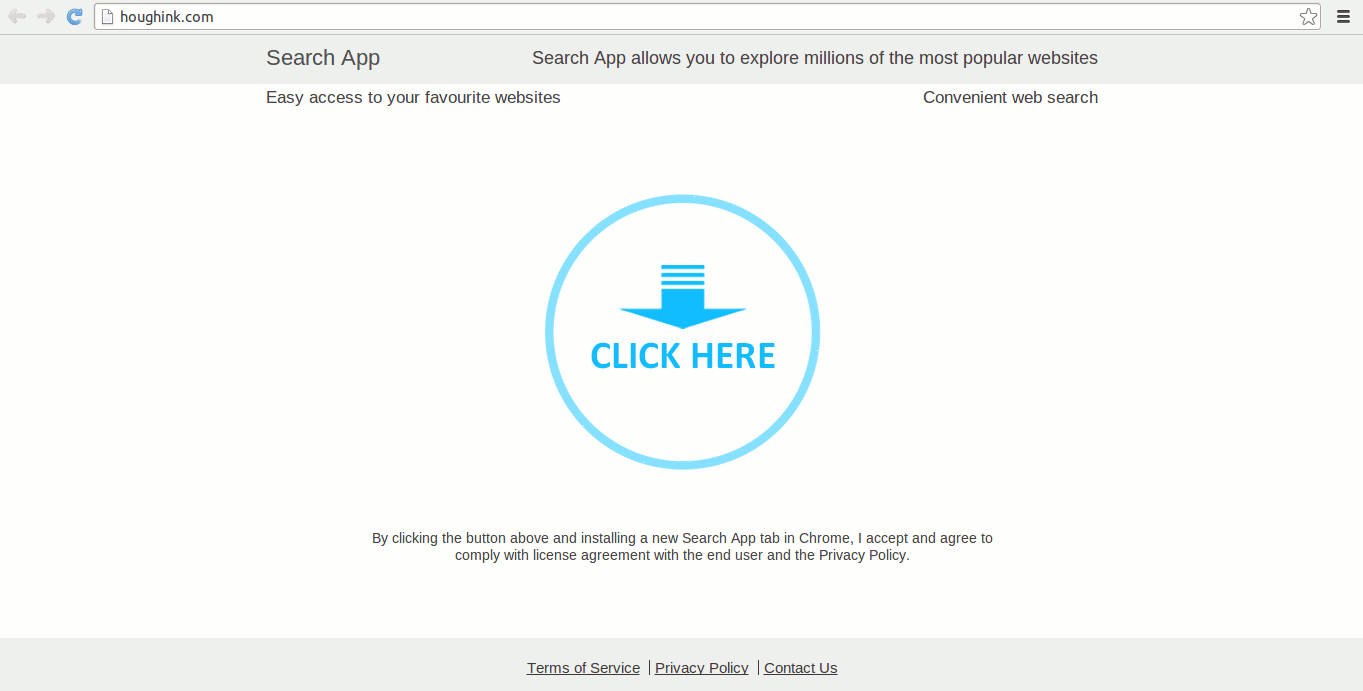
Houghink.com is a suspicious web domain which may display on your web browsers after infection of a browser hijacker virus. This unwanted program distributed among the PC users through Search App or Houghink browser extension program and displayed you as the "The Best Search Extension Ever". However there is nothing reality in its punch dialogue. After successful infiltration into your system the prime activity of this hijacker to make full control on your web surfing agents so called browser like Google Chrome, IE, Edge, Opera, Mozilla Firefox to make changes into their previous set settings to easily reset your home page or search engine page with itself or several vicious pages to redirected you whenever you tried to visit a legitimate websites or security sites. It injects malicious advertisements into your browsers and if you accidentally click on it then you might got infected with some different infections so be alert.
Houghink.com : More Analysis On It
|
Name |
Houghink.com |
|
Type
|
Browser Hijacker |
|
Risk |
Medium |
|
IP address |
104.28.6.252 |
|
Created |
11/10/2017 |
|
Expires |
11/10/2018 |
|
Updated |
11/10/2017 |
|
Symptoms |
Constant redirections, hijacked browsers, replaced home page or search engine etc. |
|
Delivery |
Infected ads or pop-ups, spam emails, freeware or shareware etc. |
|
Infected OS |
Windows |
Houghink.com : Spreading ways of hijacker on your system
Malware developers distribute the hijackers infections among the cyber users by following various infecting ways. One of the most commonly method via stealth installation in which the makers drop malware infected files into the installers of free downloaded software which do not show the list of the program that are going to install on your system just because of that of installation of additional or suspicious programs on your system to infect it. So you should always use "Custom or Advanced" screen that helps you to see the installation list and if you found anything wrong then stop installation.
So you should not do more delay to remove Houghink.com from infected PC by using a trusted anti-malware to clean your PC from malware.
>>Free Download Houghink.com Scanner<<

Know How to Uninstall Houghink.com Manually From Windows PC
In order to do it, it is advised that, start your PC in safe mode by just following the steps:-
Step 1. Restart your computer and Press F8 button until you get the next window.

Step 2. After that on the new screen you should select Safe Mode option to continue this process.

Now Show Hidden Files As Follows :
Step 1. Go to Start Menu >> Control Panel >> Folder Option.

Step 2. Now Press View Tab >> Advance Setting category >> Hidden Files or Folders.

Step 3. Here you need to tick in Show hidden files, folder or drives.
Step 4. Finally hit Apply and then OK button and at the end close the current Window.
Time To Delete Houghink.com From Different Web browsers
For Google Chrome
Steps 1. Start Google Chrome and hot Menu icon at the top right corner of the screen and then select Settings option.

Step 2. Here you need to select required search provider in Search option.

Step 3. You can also manage search engine and make it your personalize setting by clicking on Make it default button.

Reset Google Chrome Now in given way:-
Step 1. Get Menu Icon >> Settings >> Reset settings >> Reset

For Mozilla Firefox:-
Step 1. Start Mozilla Firefox >> Setting icon >> Options.

Step 2. Press Search option and pick required search provider to make it default and also remove Houghink.com from here.

Step 3. You can also add other search option on your Mozilla Firefox.
Reset Mozilla Firefox
Step 1. Choose Settings >> Open Help Menu >> Troubleshooting >> Reset Firefox

Step 2. Again click Reset Firefox to eliminate Houghink.com in easy clicks.

For Internet Explorer
If you want to remove Houghink.com from Internet Explorer then please follow these steps.
Step 1. Start your IE browser and select Gear icon >> Manage Add-ons.

Step 2. Choose Search provider >> Find More Search Providers.

Step 3. Here you can select your preferred search engine.

Step 4. Now Press Add to Internet Explorer option >> Check out Make this my Default Search Engine Provider From Add Search Provider Window and then click Add option.

Step 5. Finally relaunch the browser to apply all modification.
Reset Internet Explorer
Step 1. Click on Gear Icon >> Internet Options >> Advance Tab >> Reset >> Tick Delete Personal Settings >> then press Reset to remove Houghink.com completely.

Clear browsing History and Delete All Cookies
Step 1. Start with the Internet Options >> General Tab >> Browsing History >> Select delete >> Check Website Data and Cookies and then finally Click Delete.

Know How To Fix DNS Settings
Step 1. Navigate to the bottom right corner of your desktop and right click on Network icon, further tap on Open Network and Sharing Center.

Step 2. In the View your active networks section, you have to choose Local Area Connection.

Step 3. Click Properties at the bottom of Local Area Connection Status window.

Step 4. Next you have to choose Internet Protocol Version 4 (TCP/IP V4) and then tap on Properties below.

Step 5. Finally enable the Obtain DNS server address automatically option and tap on OK button apply changes.


Well if you are still facing issues in removal of malware threats then you can feel free to ask questions. We will feel obliged to help you.

Related Posts
 ExecutiveOperation Search Removal: Best Way To Remove ExecutiveOperation Search In Simple Clicks
- Best Way To Get Rid Of IMovieSearch Search
- Delete MixedFin from Internet Explorer : Clear Away MixedFin
- Deleting Search-fine.com Manually
- Delete Search.basicgeneration.com from Opera
- Removing Spacerin Search Easily