What do you know about Secure-finder.org?
Secure-finder.org is presented as a search engine to the web surfers as a more reliable and secure alternative to the giants like Google.com and Bing.com. The website claims to offer the search functionality to its users which do not include any tracking cookies that is completely opposed to the traditional search engines onto competing services. System users who like the idea behind this web portal are offered to download and install a web browser extension and make sure that they are presented with the search suggestions by Secure-finder.org into their search bar and the Omnibox. The browser extension offered by the domain is available for Chrome, Safari, Mozilla, IE and Edge.
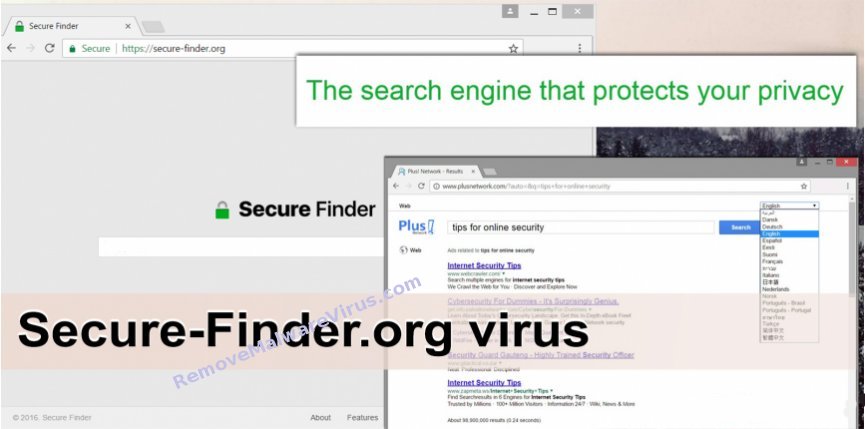
Although, the web surfers who install the suggested extension should make sure to read the Terms of Service agreement and FAQ section. It claims to make an effort on keeping your web searches private, does not track your browsing activities, doesn't save the history and does not send any data about your system and browser to third parties or other. However, the RMV security experts have found that it is quite hard to believe anything that Secure-finder.org claims. Since the web surfers are rerouted to Plusnetwork.com website as soon as they enter any keywords into the search field and hit the “Enter” button. Besides, Plusnetwork.com domain has been mentioned in several cases of browser hijacking, and it emerged various redirect gateways, such as Tech-connect.biz, Web-start.org and Search.rapidsearch.com in the January 2017 which lead system users to Plusnetwork.com site.
Should You Trust Secure-finder.org?
If Secure-finder.org search engine doesn't send your search queries to any other web pages, then there should be no reason to be rerouted to Plusnetwork.com. The statement at this web domain and the behavior of its associated browser extension show that the web surfers are provided with misleading information. Furthermore, instead of the security and search results on this website, the users are provided with sponsored links on a domain with a suspicious and questionable reputation. Also, its related browser extension may gather your data like IP address, bookmark collection, browser type and OS version in order to help the advertisers on Plusnetwork.com website to recognize you and load the personalized commercial ads. The application linked to Plusnetwork.com and Secure-finder.org is identified as a browser hijacker virus that you might want to be deleted from your machine.
>>Free Download Secure-finder.org Scanner<<
Know How to Uninstall Secure-finder.org Manually From Windows PC
In order to do it, it is advised that, start your PC in safe mode by just following the steps:-
Step 1. Restart your computer and Press F8 button until you get the next window.

Step 2. After that on the new screen you should select Safe Mode option to continue this process.

Now Show Hidden Files As Follows :
Step 1. Go to Start Menu >> Control Panel >> Folder Option.
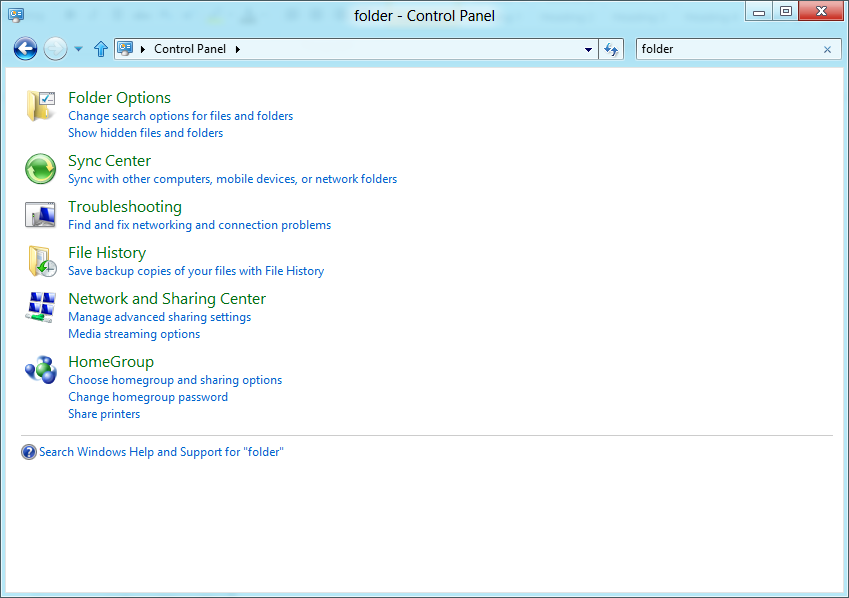
Step 2. Now Press View Tab >> Advance Setting category >> Hidden Files or Folders.

Step 3. Here you need to tick in Show hidden files, folder or drives.
Step 4. Finally hit Apply and then OK button and at the end close the current Window.
Time To Delete Secure-finder.org From Different Web browsers
For Google Chrome
Steps 1. Start Google Chrome and hot Menu icon at the top right corner of the screen and then select Settings option.

Step 2. Here you need to select required search provider in Search option.

Step 3. You can also manage search engine and make it your personalize setting by clicking on Make it default button.

Reset Google Chrome Now in given way:-
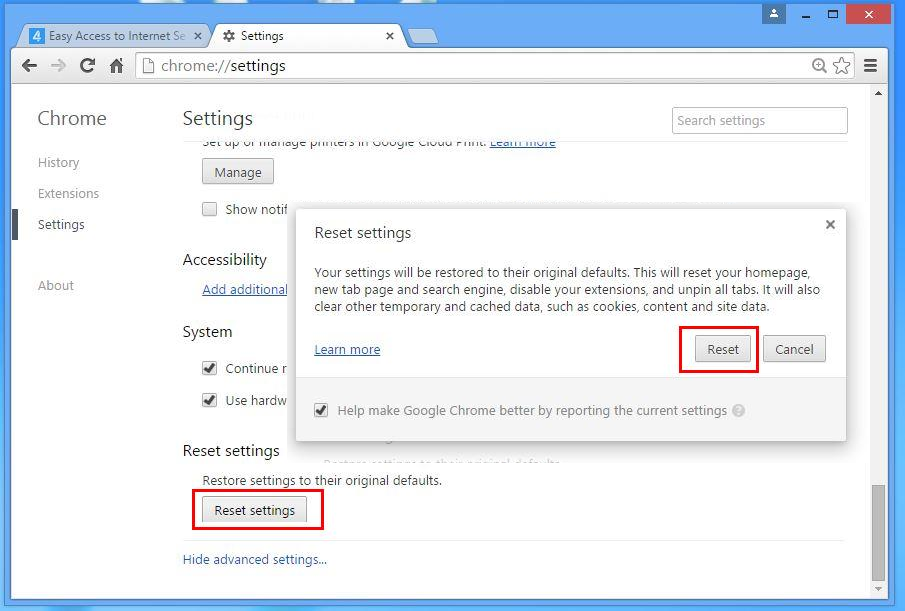
Step 1. Get Menu Icon >> Settings >> Reset settings >> Reset
For Mozilla Firefox:-
Step 1. Start Mozilla Firefox >> Setting icon >> Options.

Step 2. Press Search option and pick required search provider to make it default and also remove Secure-finder.org from here.
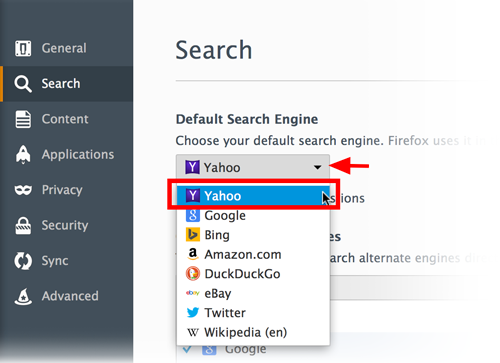
Step 3. You can also add other search option on your Mozilla Firefox.
Reset Mozilla Firefox
Step 1. Choose Settings >> Open Help Menu >> Troubleshooting >> Reset Firefox

Step 2. Again click Reset Firefox to eliminate Secure-finder.org in easy clicks.

For Internet Explorer
If you want to remove Secure-finder.org from Internet Explorer then please follow these steps.
Step 1. Start your IE browser and select Gear icon >> Manage Add-ons.
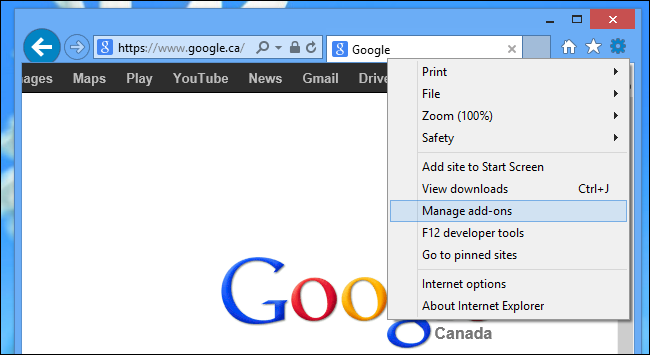
Step 2. Choose Search provider >> Find More Search Providers.
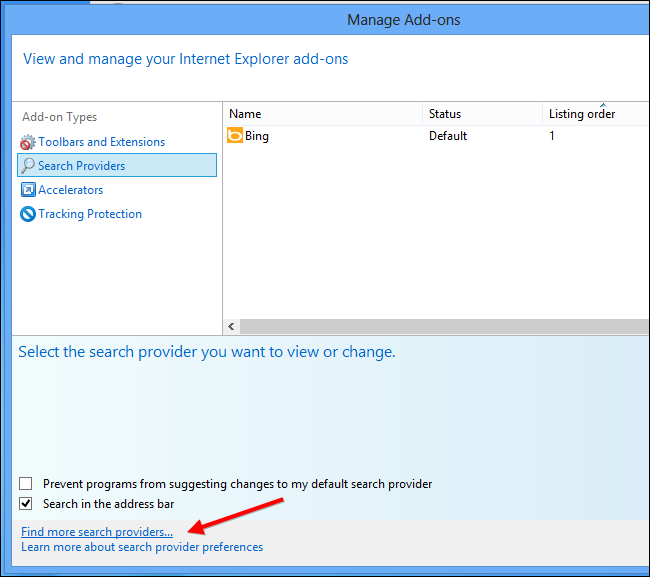
Step 3. Here you can select your preferred search engine.

Step 4. Now Press Add to Internet Explorer option >> Check out Make this my Default Search Engine Provider From Add Search Provider Window and then click Add option.

Step 5. Finally relaunch the browser to apply all modification.
Reset Internet Explorer
Step 1. Click on Gear Icon >> Internet Options >> Advance Tab >> Reset >> Tick Delete Personal Settings >> then press Reset to remove Secure-finder.org completely.

Clear browsing History and Delete All Cookies
Step 1. Start with the Internet Options >> General Tab >> Browsing History >> Select delete >> Check Website Data and Cookies and then finally Click Delete.

Know How To Fix DNS Settings
Step 1. Navigate to the bottom right corner of your desktop and right click on Network icon, further tap on Open Network and Sharing Center.

Step 2. In the View your active networks section, you have to choose Local Area Connection.

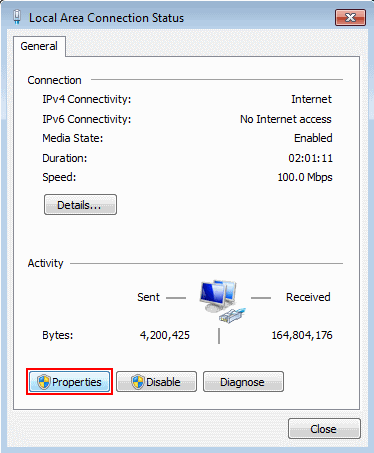
Step 3. Click Properties at the bottom of Local Area Connection Status window.
Step 4. Next you have to choose Internet Protocol Version 4 (TCP/IP V4) and then tap on Properties below.
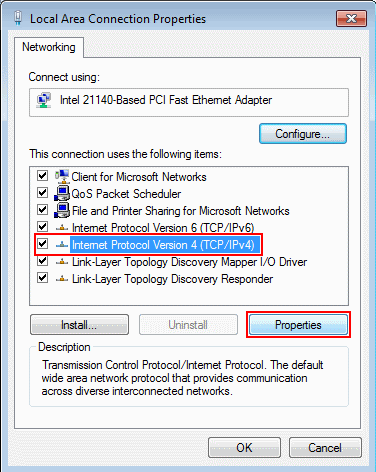
Step 5. Finally enable the Obtain DNS server address automatically option and tap on OK button apply changes.

Well if you are still facing issues in removal of malware threats then you can feel free to ask questions. We will feel obliged to help you.


