
Hello friends, I am Alen and I am using Windows 10 PC from last few years. I have an excellent experience with this OS but suddenly one week ago, I have noticed that my Windows 10 system freezes randomly and slows down. After lots of researches, I found that it happens because of High CPU Usage by Sppsvc.exe on Windows 10. So, I am in search of best instruction to fix such an issue. If you have any solution to fix High CPU Usage by Sppsvc.exe on Windows 10 issue then please suggest me. The working solution will be appreciated. Thanks in advance…

Things You Must Know About Sppsvc.exe on Windows 10
Sppsvc.exe is regarded as a “Microsoft Software Protection Platform Service” on Windows 10 which is also referred as Sppsvc. This executable file belongs to the MS Windows and it is regarded as one of integral part of Windows System which is aimed at the software tampering protection and the piracy prevention. It’s services seems as a trusted one but despites of advantages, the executable file tends to initiate the issues related to the high CPU. Once, Sppsvc.exe CPU usage reaches upto 35% or more then System starts to conducts several unusual behavior. That times, users must required an appropriate solution to fix High CPU Usage by Sppsvc.exe on Windows 10.
Effective Manual Solutions To Fix High CPU Usage by Sppsvc.exe on Windows 10
Solution 1 : Update Windows System To Latest Build
-
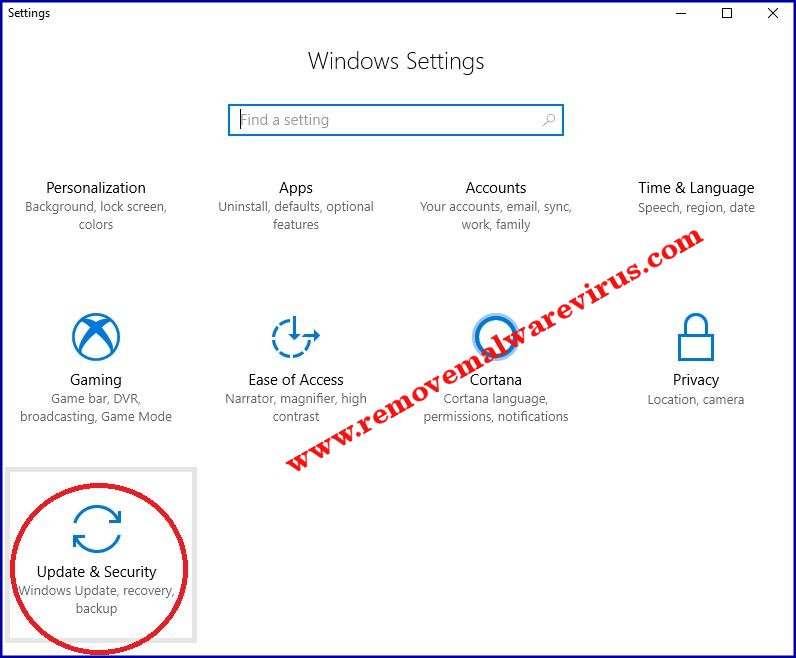
- On your Windows 10 PC, press Win+I key together and choose option of “Updates & Security”.

-
- On next, go to Windows Updates section.
- After that, click on the button of ‘Check for Updates’ and then wait for a while.
- If your system required for updates then click on option of ‘Run the Updates’.
- At last, restart your Windows 10 PC.
Solution 2 : Execute System Maintenance Troubleshooter
-
- Start your Windows 10 PC.
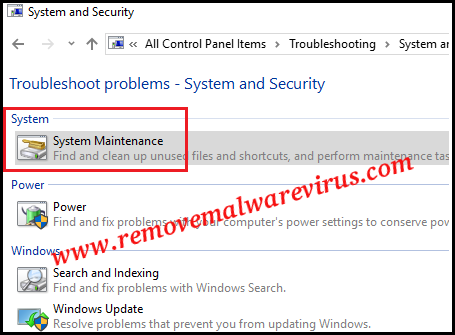
- In search bar of Windows, search for Control Panel and then open it.

-
- On next go to Troubleshooting >> System & Security.

-
- In this displayed list, find out the option of System Maintenance Troubleshooter.
- Click on the option and run it.
- Once, troubleshooter has complete it’s job completely, restart your Windows 10 PC.
Solution 3 : Restart The Process of Sppsvc.exe
-
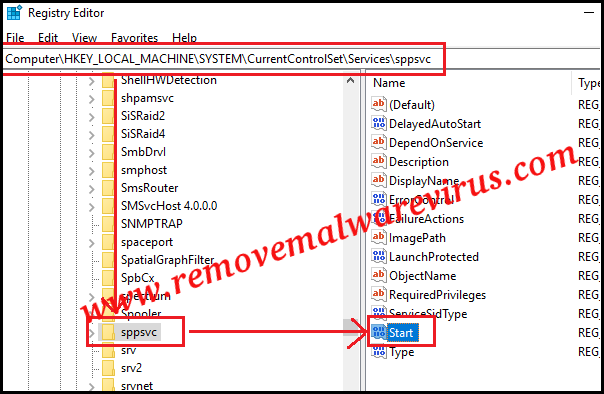
- Press Win+R key together.

-
- In the Run box, type regedit and hit on Enter key.

-
- Now, navigate to HKLM\\SYSTEM\\CurrentControlSet\\Services\\sppsvc using left pane.
-
- Now, modify Start value from the any number to number 4.

- After that reboot your PC.
Solution 4 : Stop The Service of Software Protection
-
- Press Win+R key to launch Ron box.

-
- In Run box, type services.msc command which as a result Service Manager window will be displayed on your screen.

-
- Now, locate Software Protection service and right-click on it.
- Choose option of All Tasks > then select ‘Stop’ option.

Hopefully, the above described manual instruction will help you to fix High CPU Usage by Sppsvc.exe on Windows 10. So, you must try any solution to fix such an issue.
Related Posts
 New AgeLocker Ransomware Abuses Legit ‘Age’ Encryption Tool
 Five Ways to Check If a Website Is Safe?
 Resolve The Recycle Bin on C:/ is corrupted Error on Windows 10
 (Resolved) Headphones Not Working In Windows 10
 Best Method To Fix The Javaw.exe Error On Windows
 (Resolved) 0X000000A5 Blue Screen Stop Error on Windows