
Are you getting Chrome ERR SPDY PROTOCOL error while browsing the popular sites on your browser? Want to know the reasons behind the occurrence of this error message? Searching for an easy and permanent solution to fix Chrome ERR SPDY PROTOCOL error? If so, this post will definitely help you to resolve your all issue. Read this post carefully till the end and follow the described instruction in exact order.
Meaning of Chrome ERR SPDY PROTOCOL Error
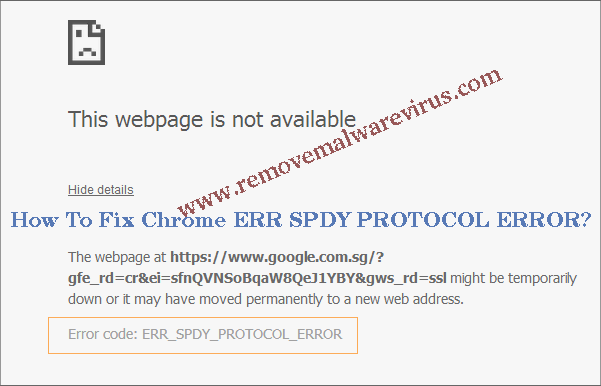
The appearances of Chrome ERR SPDY PROTOCOL error is a clear indication that there is something an issue with SPDY. Actually, SPDY is a protocol of the chrome’s browser specifically designed to load webpages too much faster to improve web security. This type of protocol is developed by Google but due to the issue of HTTP 2 vulnerability, the Google has stopped supporting the protocol of SPDY. Behind the occurrence of this error message, there are hundreds of reason responsible but the most common reason are outdated Google Chrome browser, firewall or anti-virus blocking and much more.
Most Working & Easy Solution To Fix Chrome ERR SPDY PROTOCOL Error
Solution 1 : Update Your Google Chrome Browser
-
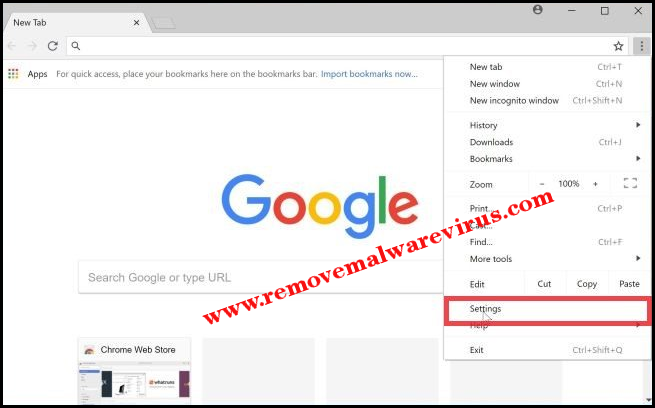
- Launch Google Chrome web browser.
- In Customize & Control icon of Chrome, choose Settings option.
-
- Now, Settings window will be displayed on your screen.
- In which you have to go with About section that lies on left pane.
- After that, you have to check your Chrome is installing updated version or not.
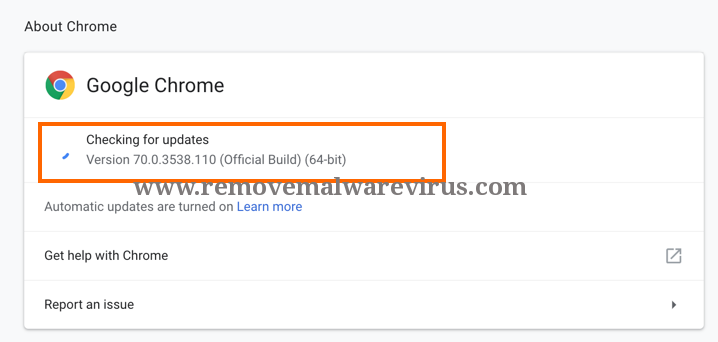
- Now, wait until the procedure of Chrome updating gets finished.
Solution 2 : Flush The Sockets
-
- Open this link : chrome://net-internals/#sockets
- From the left corner tab, you have to choose option of Sockets.
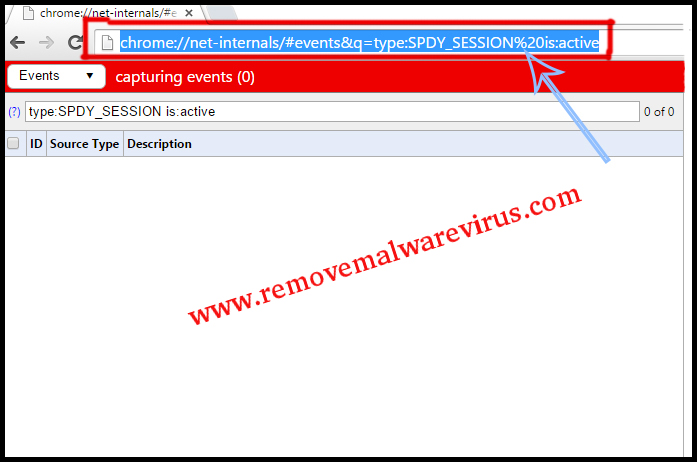
- On next, click on the option of clear socket pool.
Solution 3 : Clear The Cookies From Your Chrome Browser
-
- Open your Chrome browser.
- Go to Setting by clicking on three-dot icon situated at top left corner.
- In Settings, go to history tab.
- Click on the option of Clear Browsing Data.
-
- Now, a pop-up box with a checklist will be displayed on your screen.
- Tick on option of ‘Cached Images & Files’ and then after click on ‘Cookies and other site and plug-in data’.
- On next, you have to deselect all things in that box.
- Set the time as ‘the beginning of time’.
- After that click on the option of Clear Browsing data.
Solution 4 : Check For The Anti-virus Tool On your PC
-
- Launch the software of Avast security in your PC.
- In software, go to Setting section.
- Select option of active protection tab.
- On next, go to the Customize Web Shield Protection.
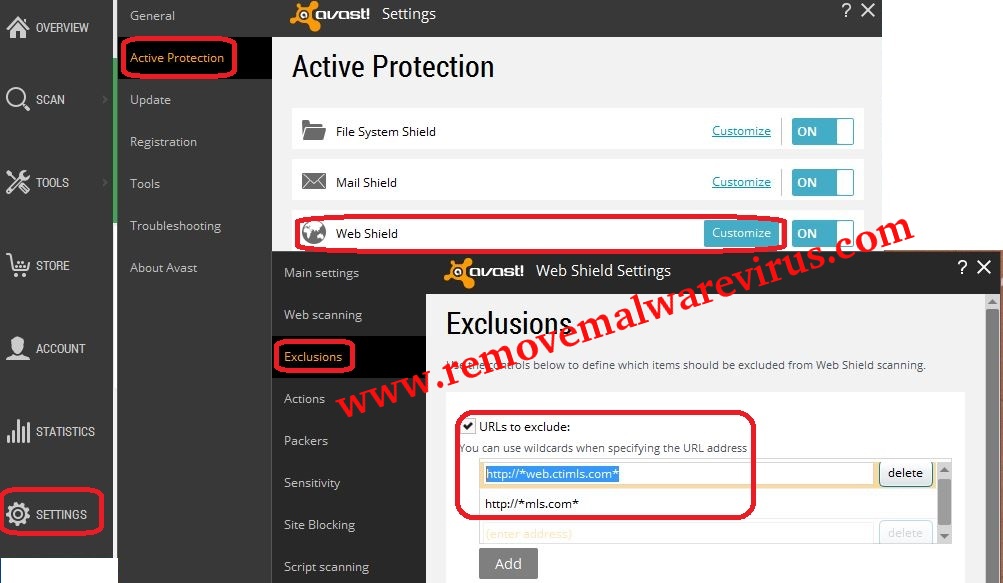
- After that, you have to add the required sites separately.
Related Posts
 New AgeLocker Ransomware Abuses Legit ‘Age’ Encryption Tool
 Five Ways to Check If a Website Is Safe?
 Resolve The Recycle Bin on C:/ is corrupted Error on Windows 10
 (Resolved) Headphones Not Working In Windows 10
 Best Method To Fix The Javaw.exe Error On Windows
 (Resolved) 0X000000A5 Blue Screen Stop Error on Windows