How to fix Mac error code 8076 ?

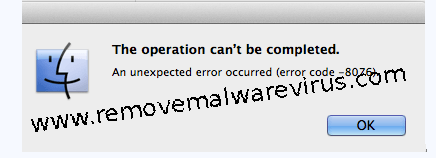 If you are a current user of Mac, then you saw oftentimes that while working on the Mac based application with Mac error Code 8076. Perhaps you face “Mac Error 8076” frequently which is an unexpected error that troubles you a lot. This error is very ridiculous and generally occurs when trying to access some parts of hard drive which have restricted permissions to do so. In such cases of Mac file corruption results in Mac OS X error code 8076 complications. When this Error 8076 message occurs on Mac, that means various symptoms involved in it such as
It crashes or freezes installed programs
It slows and sluggish Mac system behavior
It corrupts or damages Mac file
It frequently shows file not found
It does some changes in your system and shows access denied message
It will terminated automatically while you are working on Mac. So,don’t panic, you can easily Fix Mac Error 8076 problem without any tension.
Some Easy Steps To Fix Mac Error 8076 on Mac
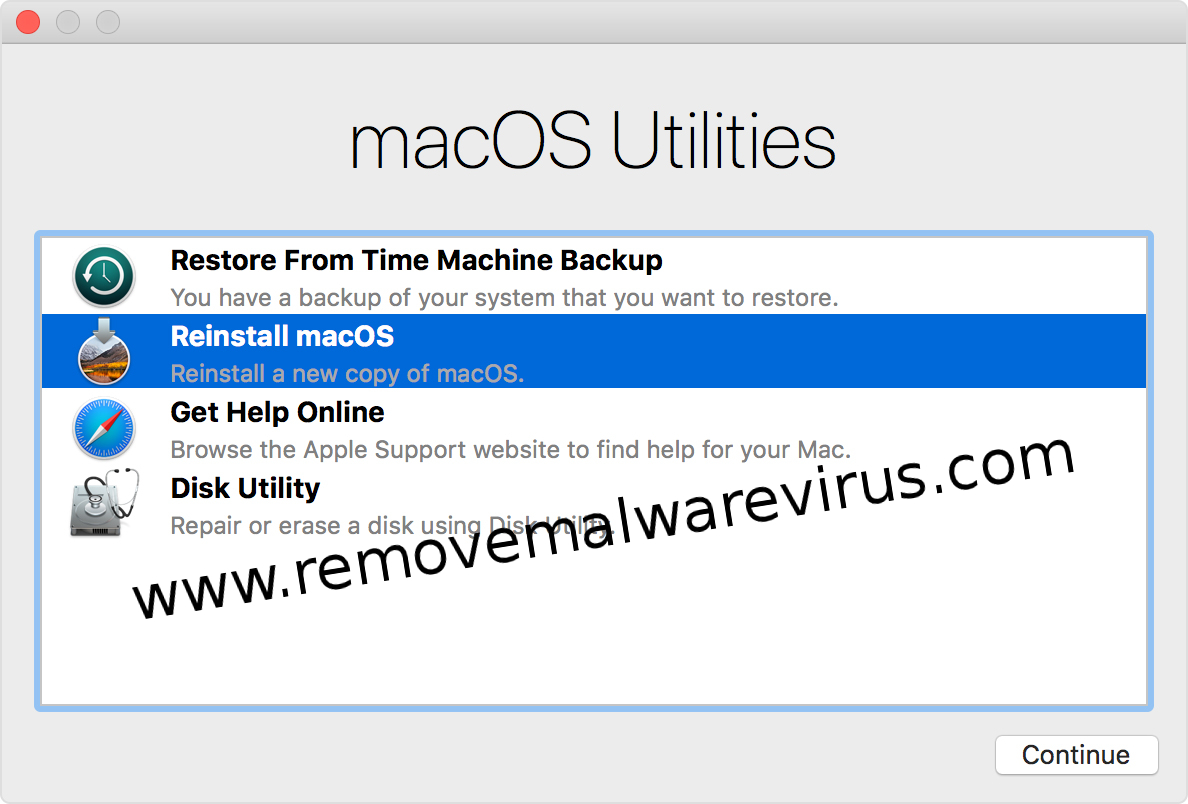
Method 1: Enter Mac OS X Recovery Mode To Fix Error 8076
Step 1: Start your Mac in Recovery mode and wait until the OS X Utility screen shows on screen.
 Step 2: Select the “Utilities” and then after “Terminal” from the Menu bar.
Step 3: Right after that you will see a Terminal window will appear then type the command “Reset password”.
Step 4: Now, Press the “Enter” key.
Step 5: Now, you will be presented with the Reset Password window on Mac screen.
Step 6: Choose your OS X drive and from the drop down under, select the user account and pick up the user account that you want to reset the password for.
Step 7: When a Reset Password window opened and if you are not going to reset a password then choose your startup volume to “Macintosh HD” unless you gave it a different name, if not already selected.
 Step 8: Now, choose your username from the menu under “Select the user account” if not already selected.
Step 9: Right after that go to “Reset Home Directory Permissions and ACL” option and click on the “Reset” button.
Step 10: At last, choose “Restart” from the menu bar.
Method 2: Using Manual Method to Fix Error 8076
Step 1: Search and launch the “Disk Utility” at first.
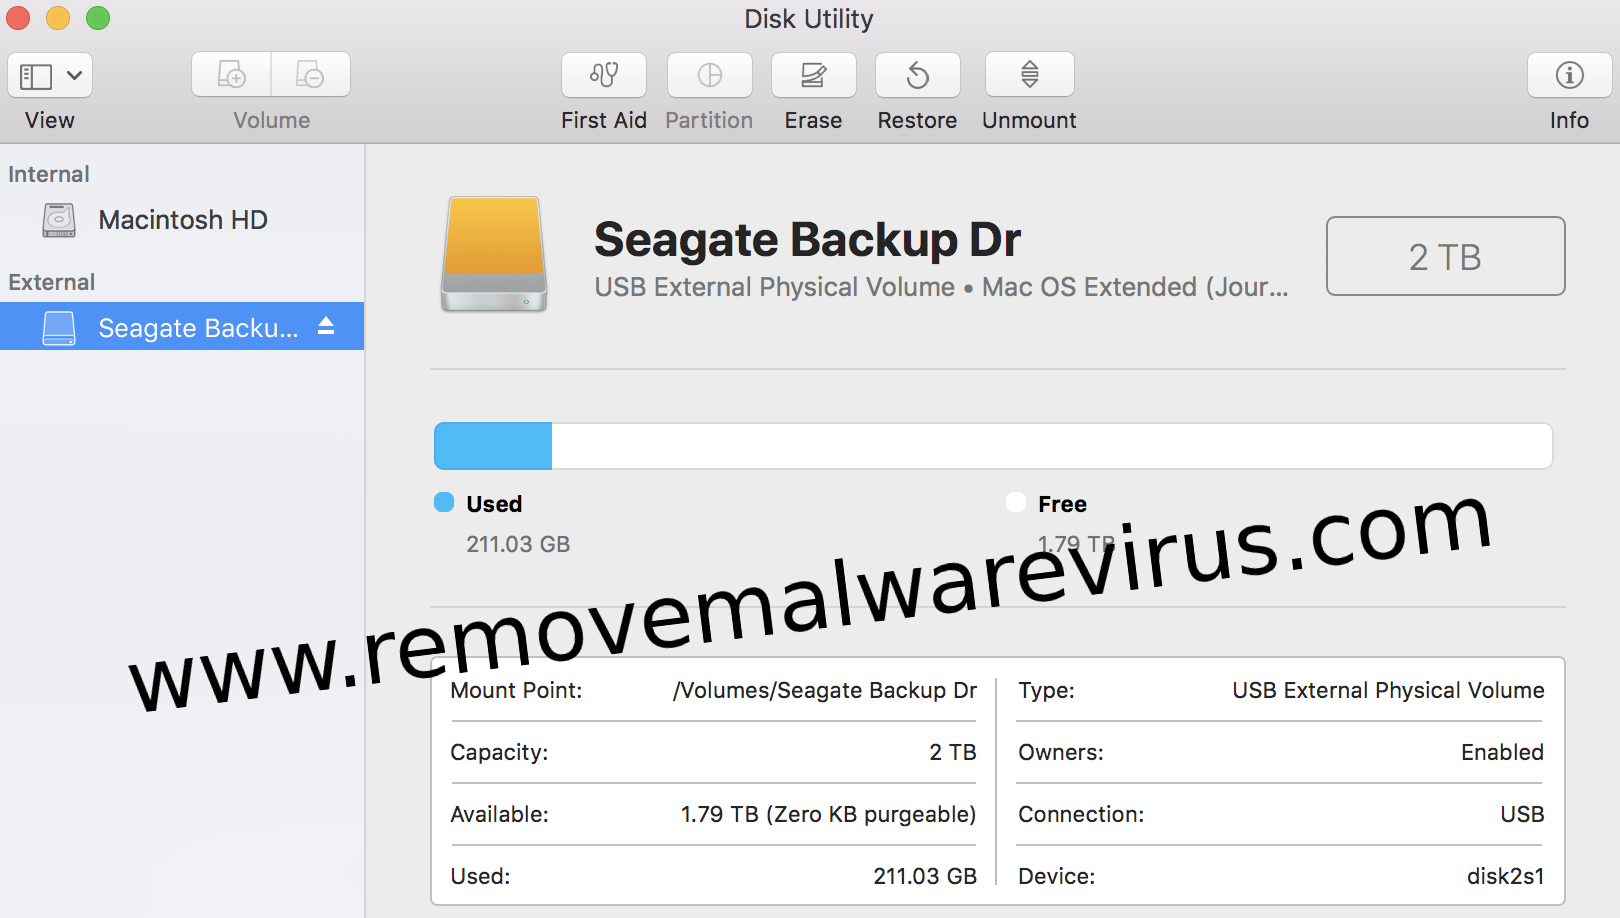 Step 2: Right after that click on “Check file system” option.
Step 3: Now, wait for a few minutes until the scanning process gets over.
Step 4: Right after that select the file which you wish to mount it.
Method 3: By Software Update
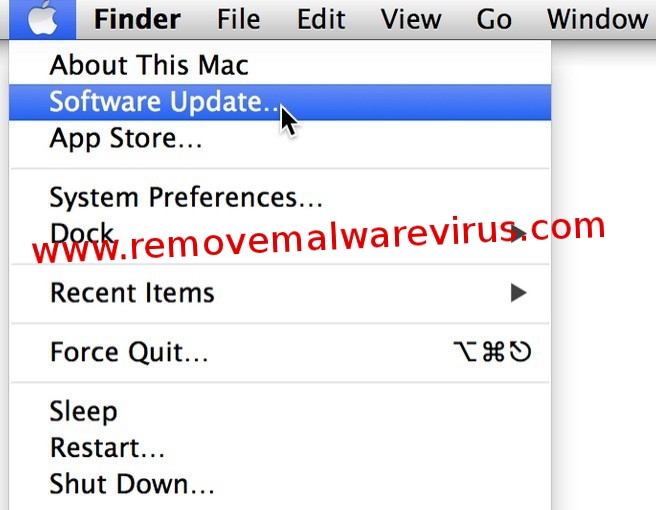
Step 1: First, select the “Apple menu” and right after that click on “Software Update” in order to verify that you have the latest version of Mac OS X or not.
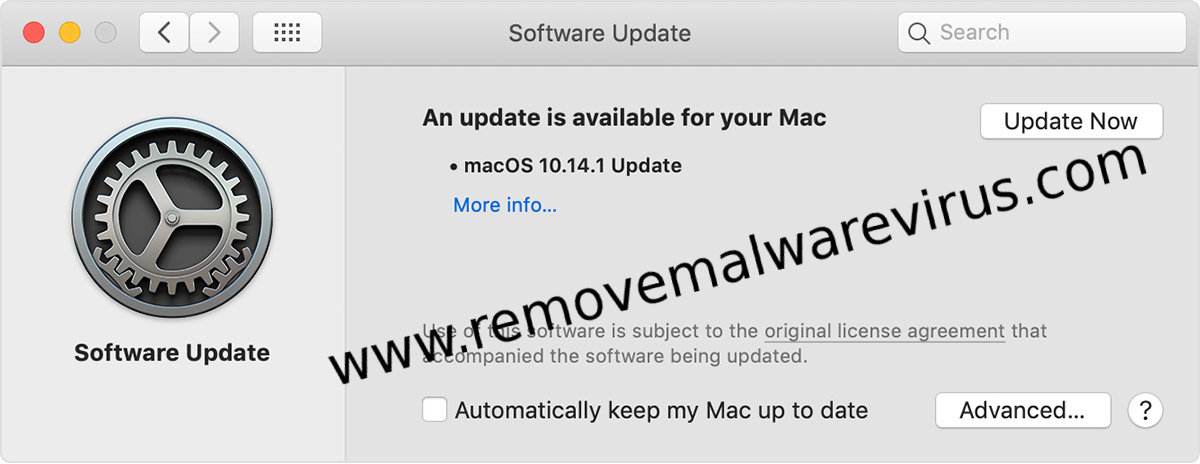 Often seen that software updates can change a file permission to improve security. Therefore, updating software can resolve some permission problems.
Related Post
Resolve Server DNS Address Could Not Be Found Error On Google Chrome
Related Posts
 New AgeLocker Ransomware Abuses Legit ‘Age’ Encryption Tool
 Five Ways to Check If a Website Is Safe?
 Resolve The Recycle Bin on C:/ is corrupted Error on Windows 10
 (Resolved) Headphones Not Working In Windows 10
 Best Method To Fix The Javaw.exe Error On Windows
 (Resolved) 0X000000A5 Blue Screen Stop Error on Windows