
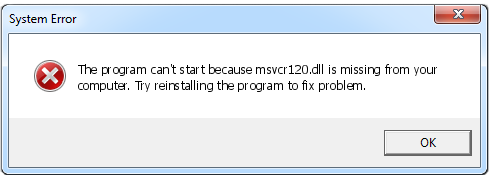
Are you seeing MSVCR120.dll is missing error on Windows each time when executing games or installing the applications in Windows PC? Are you trying to re-install the program to fix such an issue? If yes, then no need to be panic at all because it is one of the most common error message and it can be solved easily and quickly. So, keep reading this post completely.
Get Familiar With MSVCR120.dll
MSVCR120.dll is a type of Dynamic Link Library File which is regarded as one of the most crucial part of Windows OS. It is shared by the several services and applications. If somehow, it gets misplaced, corrupted or deleted due to any reason from their actual location then the linked services and applications get unable to execute. If your PC is also suffering with MSVCR120.dll is mission error on Windows then don’t panic and follow the below mentioned instructions as in the exact order.
Solutions To Fix MSVCR120.dll Is Missing Error On Windows
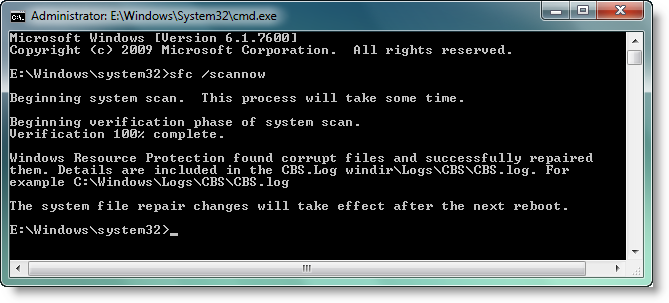
Solution 1 : Execute System File Checker
-
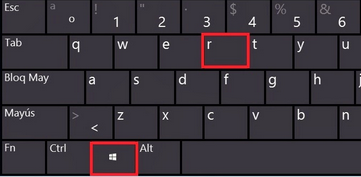
- Open the Run dialogue box by pressing Win+R key.
-
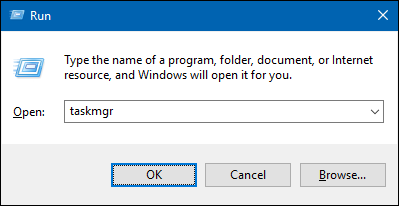
- In Run box, type taskmgr and then hit on Enter key.
-
- Now, Task Manager will be opened on your screen. From the top left side of screen, locate File and click on it. After that click on ‘Run new task’.
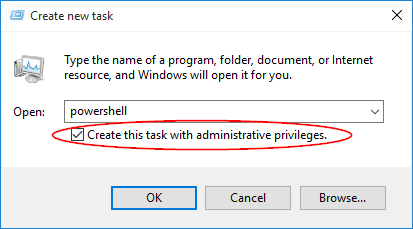
- Type powershell and check ‘Create this task with administrative privileges’ option.
-
- Now, type sfc /scannow in the Powershell window and click on Enter key.
Solution 2 : Reinstall Visual C++ Redistributable Packages
-
- First of all, you must download Visual C++ Redistributable Packages from the official site of Microsoft download and then after click on Download button.
- On next, choose file based on your System configuration and then after click on Next button.
- After downloading it successfully, double-click on the .exe file and then after follow the step-by-step on-screen instructions to install it.
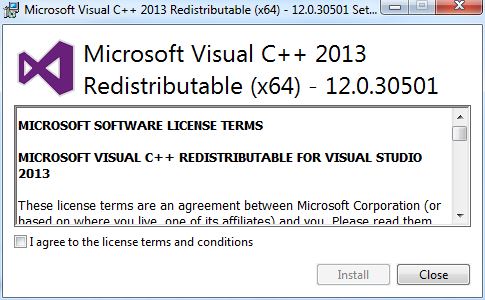
- Once installing it successfully, restart your device.
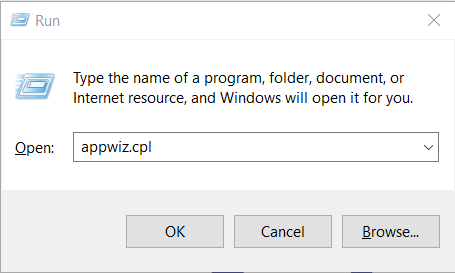
Solution 3 : Remove or Delete Any Currently Installed Application
-
- Press Win+R key together to launch Run dialogue box.
-
- In the opened Run box, type appwiz.cpl and then press on Enter key.
- Now, a window will be opened on your screen in which all currently installed application is listed.
- Right-click on the currently installed App and then choose ‘Uninstall’option.
- Lastly, restart your PC and re-install uninstalled application once again.
Solution 4 : Install All Available Updates
- Open Windows search box and type Check for updates.
- After that click on ‘Check for updates’ option.
- Now, you will be automatically lead to the Windows Update settings option.
- Click on the Check for updates button.
- If Windows displays all available updates then install them.
Solution 5 : Execute DISM Scan
-
- Start your Command Prompt as System administrator.
- In Command Prompt, type DISM /Online /Cleanup-Image /RestoreHealth command and then after click on Enter key.
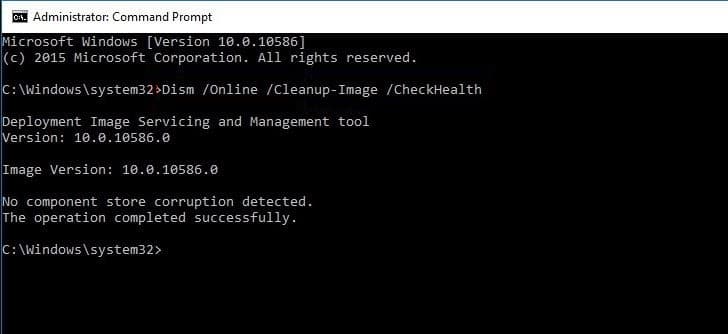
- If any errors or issues is identified with Windows then fix it.
Related Posts
 New AgeLocker Ransomware Abuses Legit ‘Age’ Encryption Tool
 Five Ways to Check If a Website Is Safe?
 Resolve The Recycle Bin on C:/ is corrupted Error on Windows 10
 (Resolved) Headphones Not Working In Windows 10
 Best Method To Fix The Javaw.exe Error On Windows
 (Resolved) 0X000000A5 Blue Screen Stop Error on Windows