
This post is created to teach Windows user on how to fix the ‘DNS server isn’t responding’ error mainly caused by the DNS errors. If you are also encountering with this error message and really want to fix it easily then go through this expert’s guide thoroughly.
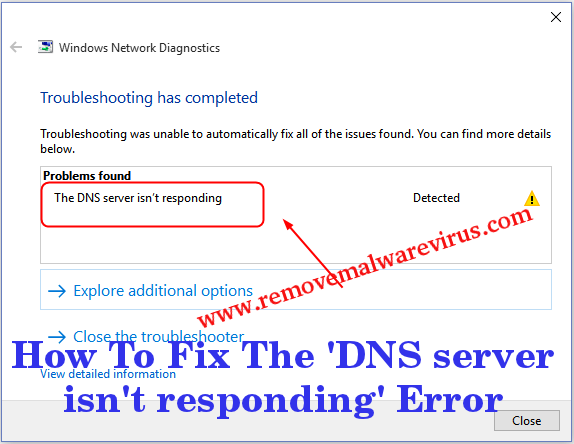
Know All About ‘DNS server isn’t responding’ Error
‘DNS server isn’t responding’ error message is one of the most common error message faced by several Windows user when they try to connect their device to home network with Internet connection and the Internet connection may fail. Behind the occurrences of this error message, there are various reasons responsible but some of the most common are : issues with site hosting Computer, improper working of DNS server in PC, block of System’s firewall and many more. Well luckily, there is a way through which you can easily fix the ‘DNS server isn’t responding’ error.
Manual Solution To Fix The ‘DNS server isn’t responding’ Error
Solution 1 : Modify Address of DNS Server
-
- Launch your Windows OS.
- Go to the Start icon and choose Control Panel option.
- Open the section of Network & Internet.
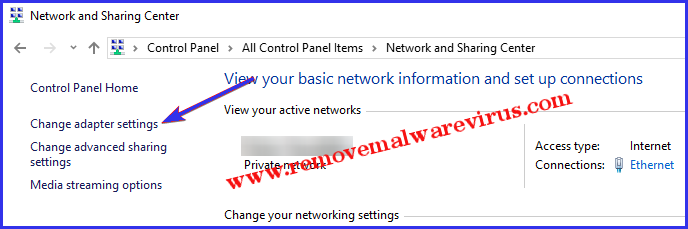
- Go to Network and Sharing center.
- On next, click on the Change adapter settings.
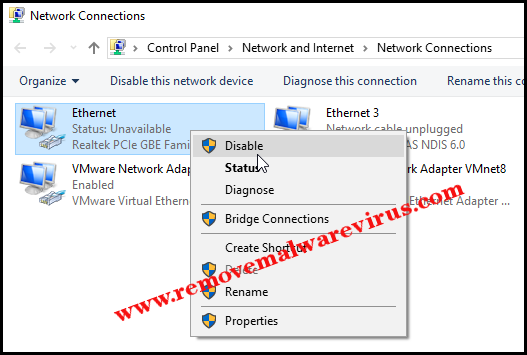
- Now, list of Network adapters will be displayed on your screen.
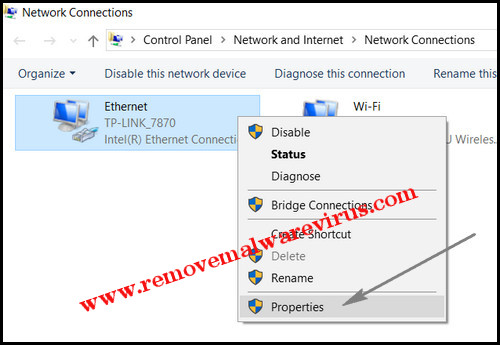
- Choose Network adapter, right-click on it and choose Properties option.
-
- After that you have to click on ‘Internet Protocol Version 4 (TCP/IPv4).

-
- The Internet Protocol Properties will be displayed on your screen.
- Choose option of ‘Use the following DNS server address:’
- Enter 208.67.222.222 as preferred DNS address and 208.67.220.220 as an alternative DNS address.
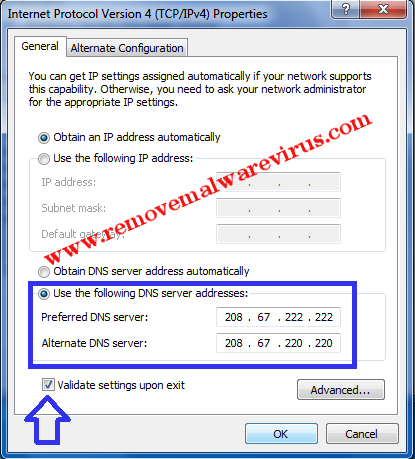
- After that you must choose option of Validate settings and then click on OK button.
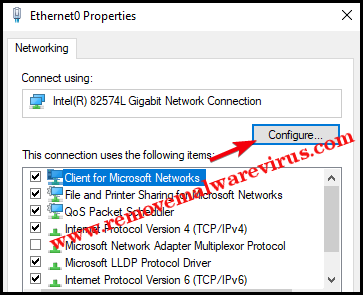
Solution 2 : Change The Physical Address
-
- Press the combination of Win+R key.
- In run box, type ncpa.cpl and then hit on enter key.
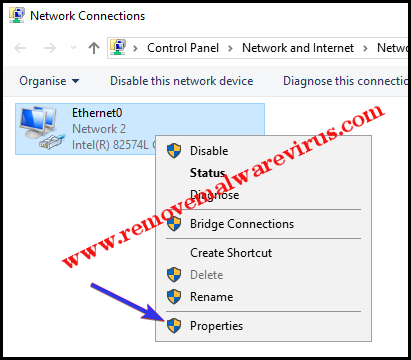
- On network connection, right-click to choose Properties option.
-
- To proceed further information, choose Configuration.
-
- Go to Advanced tab and choose Network Address.
- Now, you will see ‘Value’ category where you have to enter physical address from Command Prompt.
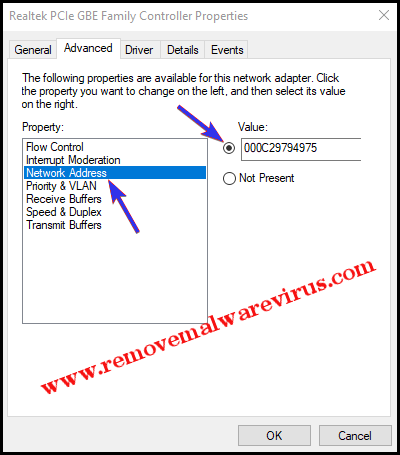
- To save all modifications, click on OK button.
- After that you should attempt to connect again.
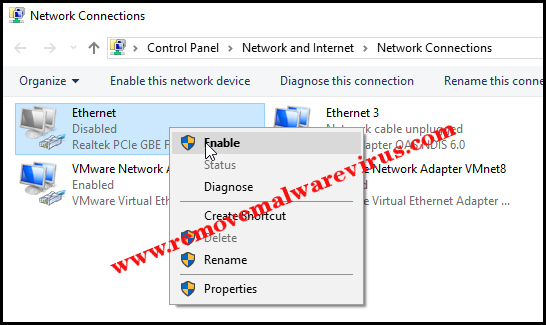
Solution 3 : Disable & Enable Network Adapter
-
- Start the Control Panel of your PC.
- Go to the ‘Networking and Sharing Center’.
- On left panel, click on ‘Change adapter settings’ link.
-
- After that, you have to right-click on network adapter and choose Disable option.
-
- Now, you have to right-click on disabled network adapter again to choose ‘Enable’ option.
Solution 4 : Execute Windows Internet Diagnostics Tool
-
- Start the Settings app,
- Click on Update & Security and then choose Troubleshoot option.
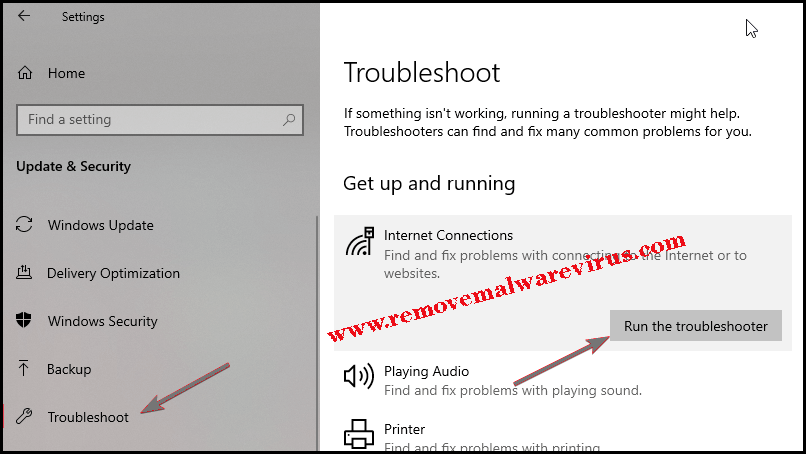
-
- From right-panel, click on Internet Connections button.
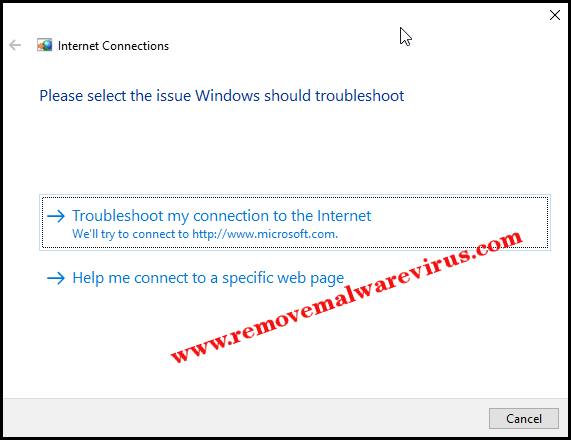
- On next, click on option of ‘Run the troubleshooter’.
- Now, you have to follow the step-by-step wizard to fix the ‘DNS server isn’t responding’ error.
Related Posts
 New AgeLocker Ransomware Abuses Legit ‘Age’ Encryption Tool
 Five Ways to Check If a Website Is Safe?
 Resolve The Recycle Bin on C:/ is corrupted Error on Windows 10
 (Resolved) Headphones Not Working In Windows 10
 Best Method To Fix The Javaw.exe Error On Windows
 (Resolved) 0X000000A5 Blue Screen Stop Error on Windows