
If you are getting Google Chrome ERR_CERT_SYMANTEC_LEGACY error while using your Chrome browser on Windows PC then need not to be worry at all. Yes, you heard absolutely right. Actually, this tutorial guide explains the reason behind the occurrence of this error message and an appropriate solution to fix Google Chrome ERR_CERT_SYMANTEC_LEGACY error. So, keep reading this tutorial guide completely.
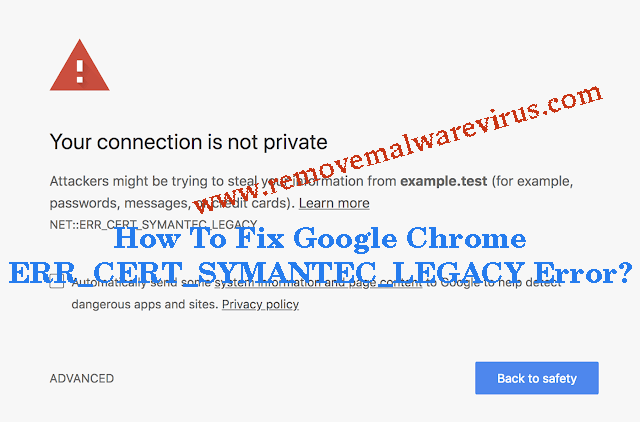
Know About Google Chrome ERR_CERT_SYMANTEC_LEGACY Error
Google Chrome ERR_CERT_SYMANTEC_LEGACY error is one of the common error message faced by almost all Chrome user. Being a Chrome user, we know that Google Chrome browser is too much strict in maintaining privacy of system users by providing the top level of security to it’s Internet products. If somehow the Google Chrome browser finds any breach of security in user’s privacy then it restricts users from accessing of online stuff and that case, it throws a warning alert like Google Chrome ERR_CERT_SYMANTEC_LEGACY error. Well, the good news is that there is an appropriate way through which you can easily fix this error message.
Reasons Behind The Occurrences of Google Chrome ERR_CERT_SYMANTEC_LEGACY
- System time failure
- Incorrect configuration settings of network connection
- Incorrect working of firewall and anti-virus settings
- An issue with browser and it’s related extensions
- Malware or virus attack on PC
- Incorrect installation of the network driver and many more.
Working Solutions To Fix Google Chrome ERR_CERT_SYMANTEC_LEGACY Error
Solution 1 : Set or Update Your System Time
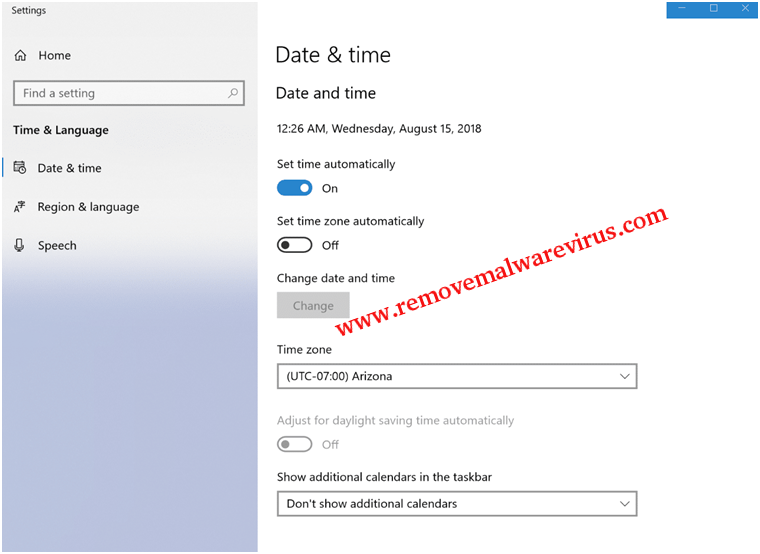
Google Chrome ERR_CERT_SYMANTEC_LEGACY error can be happened just because of system date failure. So, you must update the time on your system. On your System, you have to click on the location which indicates Time/Date and then after correct the date. After that reload your page and check whether warning message gone with loaded page or not.
Solution 2 : Install The Trusted Certificate & Import It
-
- Launch your Google Chrome browser.
- Click on HTTP lock icon and then hit on details option.
- Alternatively, you can go to the More Tools >> Developer Tools and then after click on Security tab.
- On next, click on View Certificate.
- In Certificate Viewer, click on Details and choose top certificate.
- Now, save certificate file by clicking on Export option.
- After that go to Chrome Settings >> Advanced >> Manage Certificates.
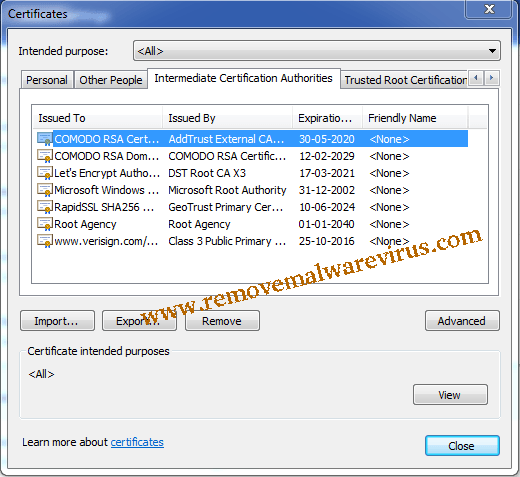
- At last, hit on Import option.
Solution 3 : Modify The Settings of Protocol DNS
- Start your Windows PC and search ncpa.cpl.
- On next, look for Internet Protocol Version 4 (RCP/IPv4) and click on it.
- After that click on Properties button.
- On next, use these DNS servers manually means Preferred DNS server as 8.8.8.8 and Alternate DNS server as 8.8.4.4.
- You have to also set IP as automatic and then restart your browser.
Solution 4 : Clear DNS Cache of Chrome Browser
-
- Visit chrome://net-internals/#dns.
- After that click on the button of Clear Host cache which is usually located to the Host resolver cache.
- Now, you will notice that sites are working properly.
Solution 5 : Clear Data & History of Chrome
-
- Start your Chrome browser.
- Go to Settings.
- Click on Clear Browsing Data.
-
- Choose option of Cookies & Caches to delete it and then after hit on Clear Browsing Data.
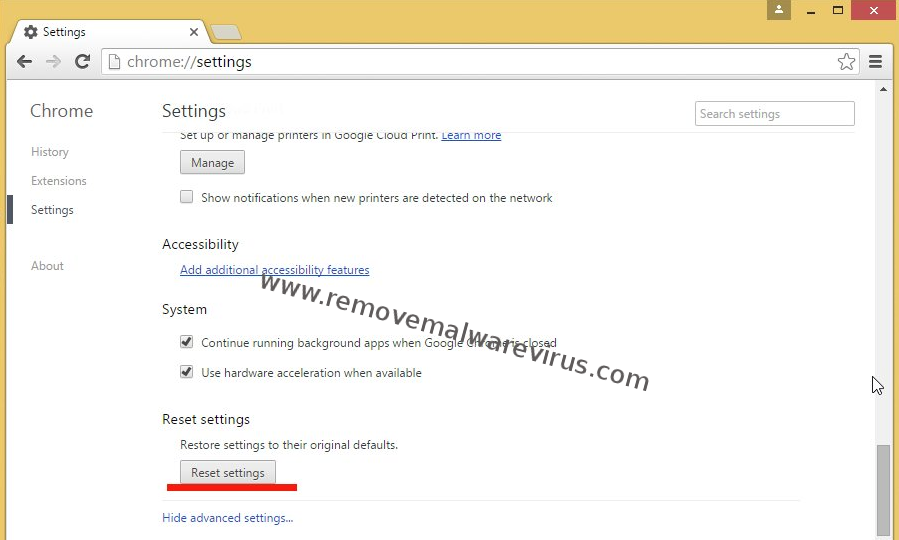
Solution 6 : Reset Your Google Chrome Browser
-
- Launch Google Chrome browser.
- Click your mouse on three dot icon and choose Settings option.
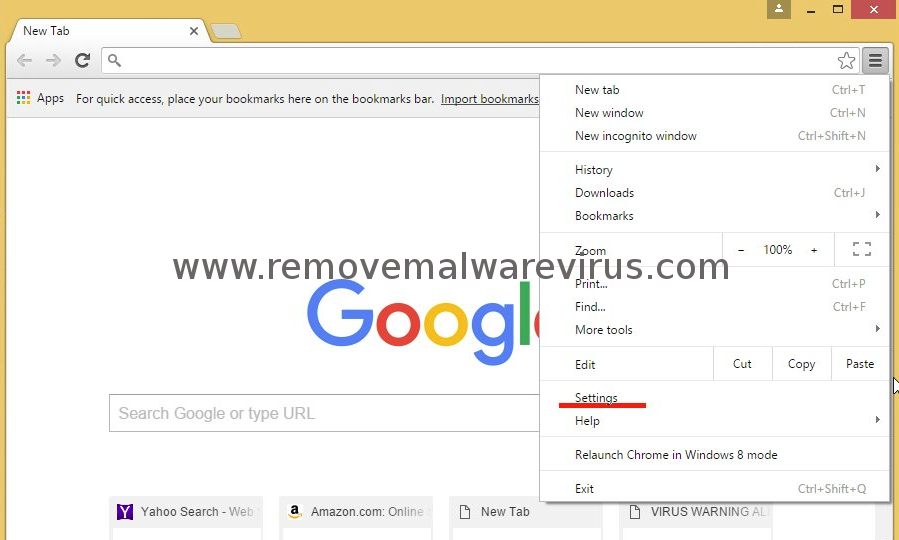
-
- On next, click on Advanced option.
- Scroll down your mouse and click on Reset option.
Related Posts
 New AgeLocker Ransomware Abuses Legit ‘Age’ Encryption Tool
 Five Ways to Check If a Website Is Safe?
 Resolve The Recycle Bin on C:/ is corrupted Error on Windows 10
 (Resolved) Headphones Not Working In Windows 10
 Best Method To Fix The Javaw.exe Error On Windows
 (Resolved) 0X000000A5 Blue Screen Stop Error on Windows