
Have you lost your network connection? Searching for an easy solution to fix ‘Windows 10 Can’t Connect To This Network’? If your answer is yes then no need to be worry at all. Just go through this expert’s guidelines and follow the provided instruction in exact order.
All About ‘Windows 10 Can’t Connect To This Network’ Error
Windows 10 Can’t Connect To This Network is another common error message faced by Windows 10 users. Such an error message mostly occur just because of the incorrect configuration of Network, issue with the network WiFi adapter or the installed driver, outdated Wi-Fi adapter, incompatible Windows 10 version and many more. The occurrences of such an error message is really a frustrating situation but luckily, there is an appropriate solution through which Windows 10 users can easily fix ‘Windows 10 Can’t Connect To This Network’ error.
Step By Step Instruction To Fix ‘Windows 10 Can’t Connect To This Network’
Solution 1 : Uninstall Network Adapter Driver
-
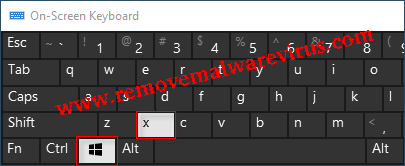
- Press the key of ‘Win logo + X’ together to launch the quick access menu.
-
- On next, click on the option of Device Manager.
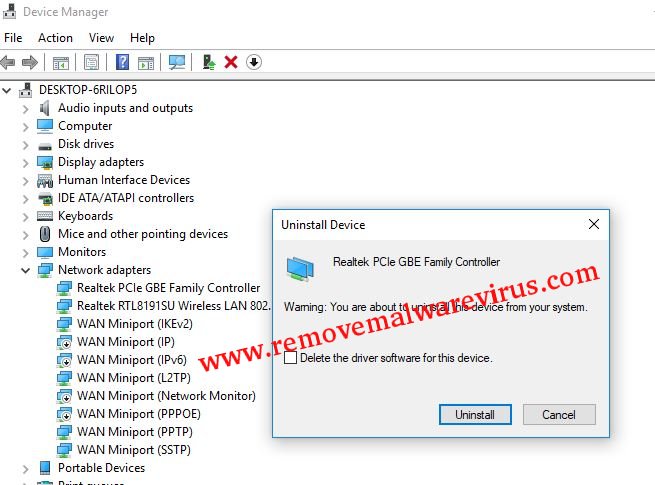
- On next, click on the Network Adapters option.
- Right-click on network adapter and choose option of Uninstall device.
- Now, a window will be displayed on your screen in which you have to tick on option of ‘Delete the driver software for this device’ and lastly click on Uninstall button.
- After that, you have to reboot your Windows 10 PC and attempt to establish your Internet connection.
Solution 2 : Disables Ipv6 and Router
-
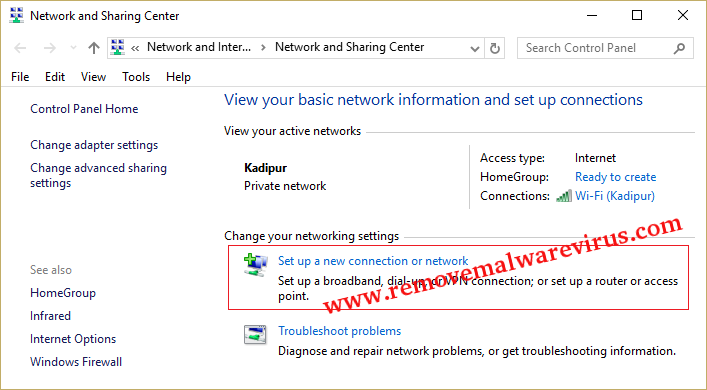
- Open the Network & Sharing center.
-
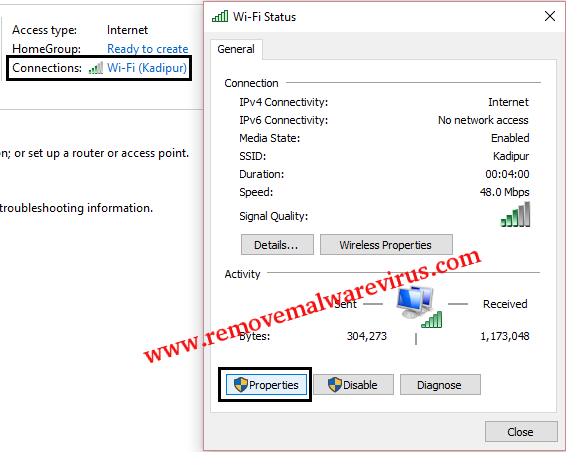
- Locate the section of Connections and after that click on your current location.
- Now, connection status window will be opened on your screen in which you have to click on Properties button.
-
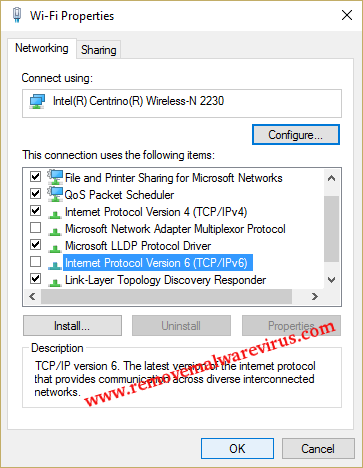
- On next, locate Internet Protocol Version 6 (TCP /Ipv6) and the uncheck it.
- To save modifications, click on OK button.
- At last, restart your PC to apply all modifications.
Solution 3 : Change The Channel Width For Network Adapter
-
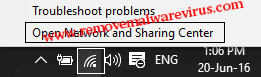
- At first, press the key of “Win+S”.
- In the search field, type network and select option of ‘Network and Sharing Center’ from the displayed list of results.
- Now, Network and Sharing Center opens up on your screen in which you have to click on the option of ‘Change adapter settings’.
-
- After locating the wireless adapter, right-click on it to choose Properties option.
- On the opened Properties window, go to Advanced tab.

- Choose 802.11 channel width and modify the value.
- To save all changes, click on OK button.
Solution 4 : Add Internet Connection Manually To Fix ‘Windows 10 Can’t Connect To This Network’
-
- Open the ‘Network & Sharing Center’.
-
- After that click on the option of ‘Set up a new connection or network’.
-
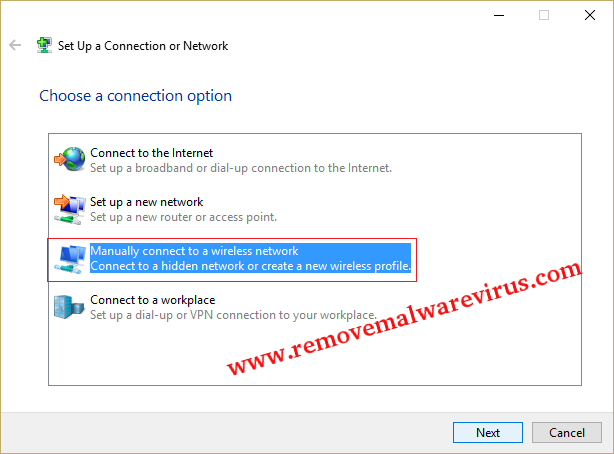
- On next, select option of ‘Manually connect to a wireless network’ and then after click on Next button.
-
- Now, you have to input the all requested detail like security key, type and network name.
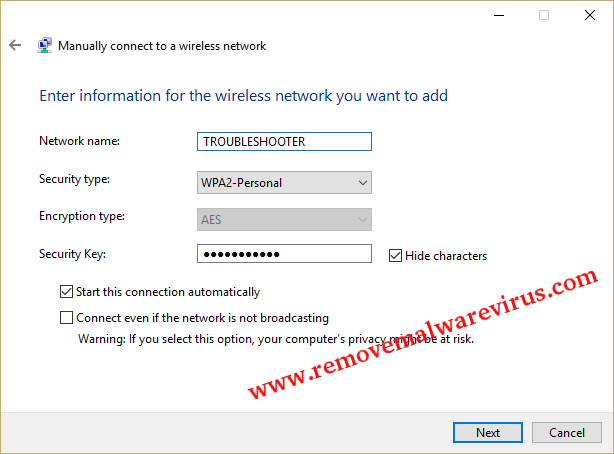
- At last, click on the Next button to finish the procedure.
Solution 5 : Use The Command of ipconfig /release
-
- Press ‘Win + X’ key together and select option of Command Prompt (Admin).
- Now, Command Prompt will be opened on your screen.
- In which, you have to input these commands and press on Enter key to execute it :
- ipconfig /release
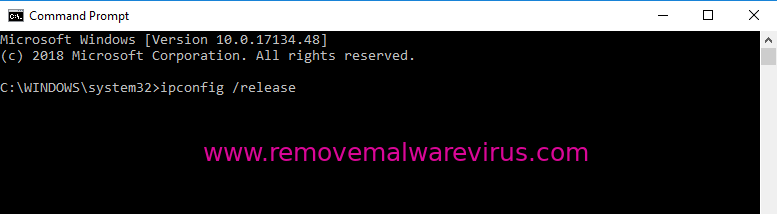
-
- ipconfig /renew

- Now, close the opened Command Prompt and attempt to connect to network again.
Related Posts
 New AgeLocker Ransomware Abuses Legit ‘Age’ Encryption Tool
 Five Ways to Check If a Website Is Safe?
 Resolve The Recycle Bin on C:/ is corrupted Error on Windows 10
 (Resolved) Headphones Not Working In Windows 10
 Best Method To Fix The Javaw.exe Error On Windows
 (Resolved) 0X000000A5 Blue Screen Stop Error on Windows